travel photography

The Northern Lights

Note: In this post I use the terms “aurora”, “aurora borealis”, “northern lights”, and “the lights” interchangeably. 

The northern lights have been on my shortlist for years and this winter I finally visited the Arctic Circle to photograph them. It’s not for lack of trying: previous attempts in Alaska and Canada were uninspired at best due to low clouds and faint auroras — though in fairness both were outstanding wildlife trips where the northern lights were sought after as a bonus, so I can’t really complain too much. 

Try again: less-than-amazing attempts to photograph the aurora on previous trips to Canada (L), and Alaska (R) where the faint glow above the horizon barely registers as a sighting!

The aurora borealis, also known as the northern lights, is a natural phenomenon that has captivated people for centuries. The lights occur when charged solar particles collide with the earth’s upper atmosphere. The North and South Poles act like magnets drawing the solar activity to far northern and southern latitudes (the southern lights are known as the aurora australis — more on the scientific explanations here.)

As I was researching locations to observe the northern lights, I weighed the tradeoffs - in particular for Fairbanks, Alaska; Iceland; Yellowknife, Canada; and Lofoten, Norway. (I expect at some point to visit all of them!)

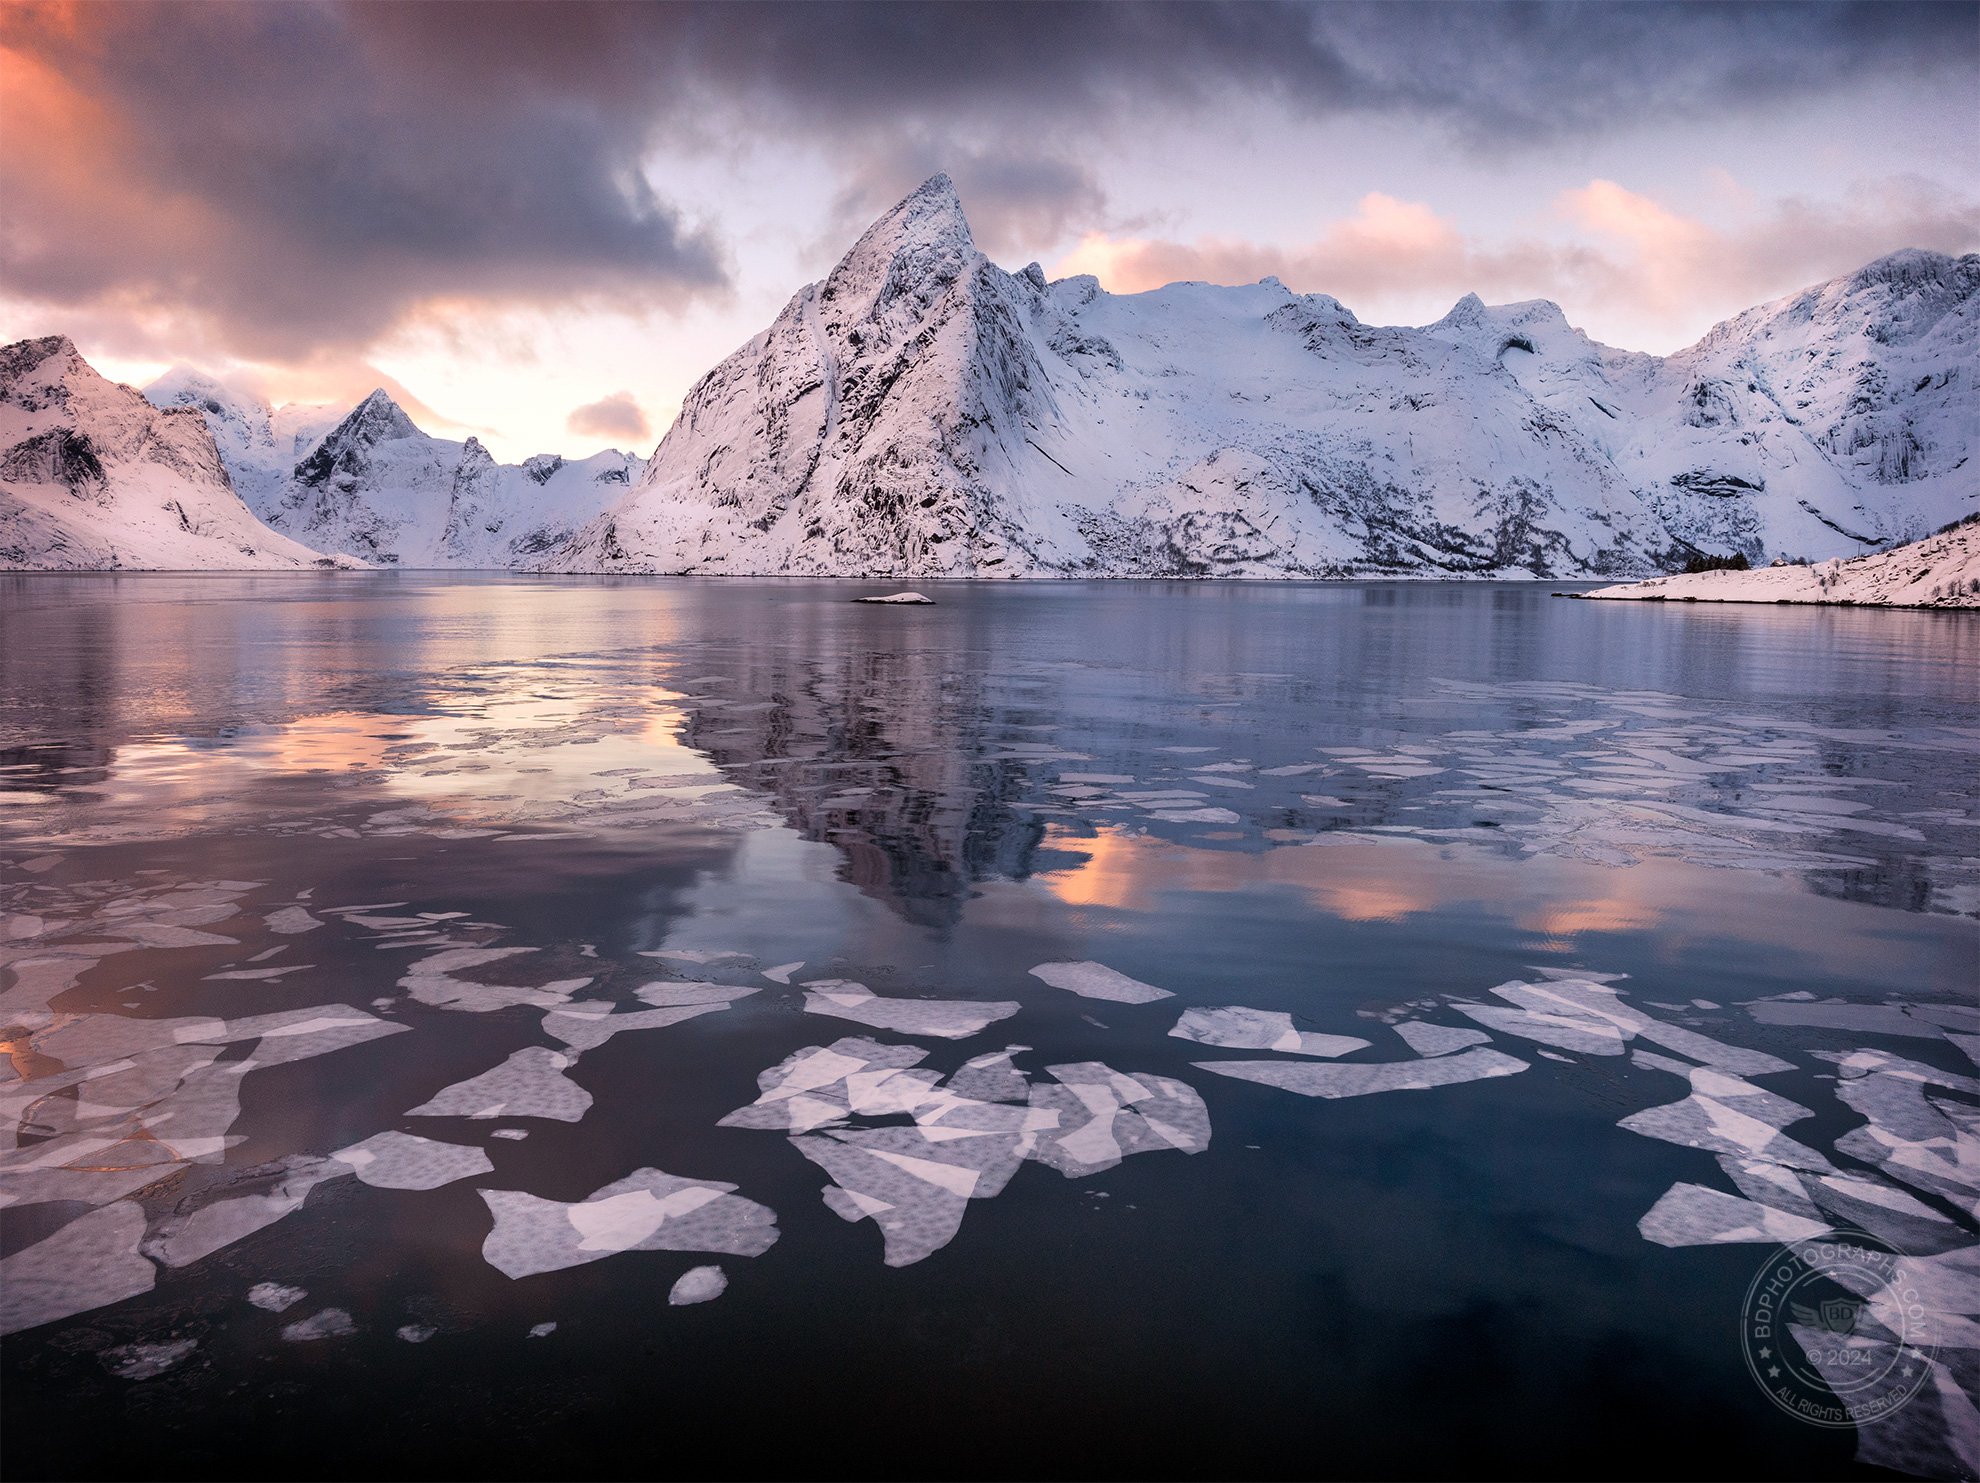
Lofoten has so much natural beauty that it almost guarantees portfolio-level images. This image was captured flying a drone very close to the surface of the water.

Fairbanks has excellent aurora sightings but lacks many photogenic locations otherwise. Iceland, while incredibly scenic, is prone to slightly less favorable weather in winter. Yellowknife, like Fairbanks, is relatively featureless tundra and is arguably the coldest of all the locations. Lofoten is the only location of the lot that is firmly within the Arctic Circle and the micro climates there can lead to more viewing opportunities, though weather is nonetheless unpredictable and dynamic. And like Iceland, Lofoten is visually beautiful so in the event that I did not see the aurora, I would be virtually guaranteed to come home with some great winter landscape photos.

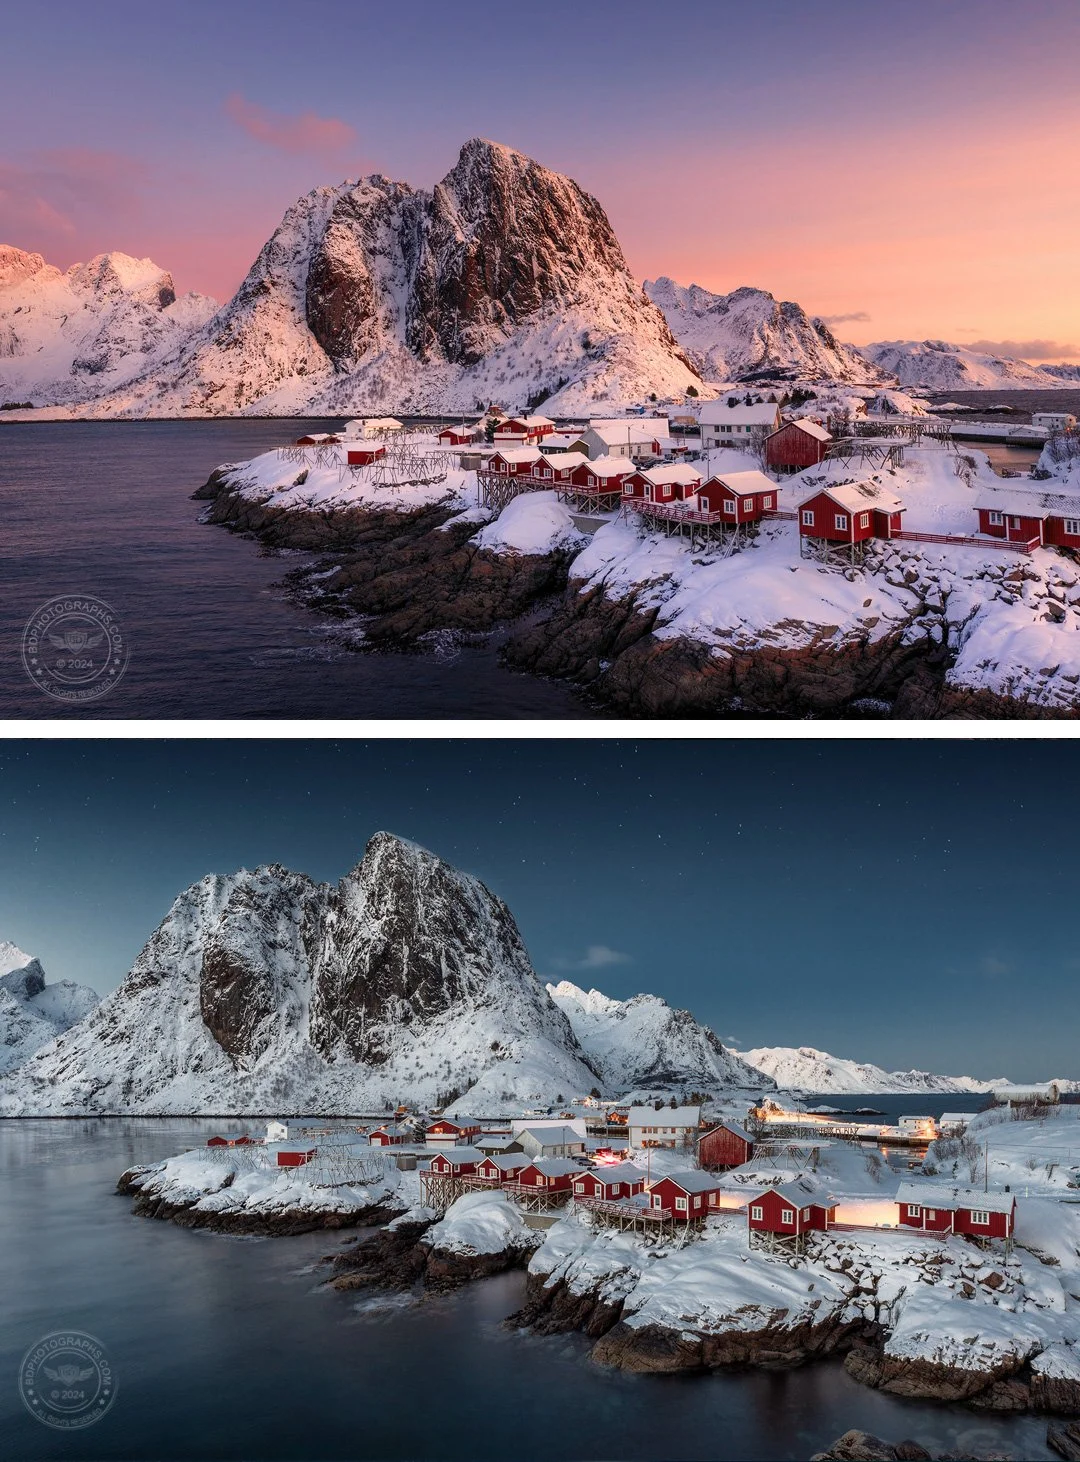
Some locations require visiting in more than one light condition. Above: a fishing village at sunrise and during evening blue hour.

I flew across the Atlantic on a three-flight hop up to Lofoten, descending through a snowstorm, and landing in a complete whiteout. I’ve seen my share of sketchy weather but I’m still not sure how those pilots made the runway. The next morning, recharged with a good night’s sleep and some hot tea, we began our tour of this Arctic wonderland.

Lofoten is an archipelago connected by land bridges in between small fishing villages. Towering fjords frame these tiny hamlets to the east and natural beaches to the west. Weather changes often and sporadically: one morning we left a sunny fishing town into a blizzard on the other side of the mountain. Of course, dynamic weather presents an opportunity in landscape photography and is without question preferred over blue skies.

Lofoten is an archipelago of towering fjords and picturesque seaside fishing villages. Photographic opportunities are everywhere.

Most of the winter imagery that I capture at home is of quaint New England vignettes: a covered bridge, a small church, a waterfall in the snowy forest, etc. One of my goals on this trip was to bring home images of snow-covered landscapes that were quite different from what I photograph at home: icy ocean scenes, Arctic fishing villages, snow-covered fjords, and, of course, the northern lights. 

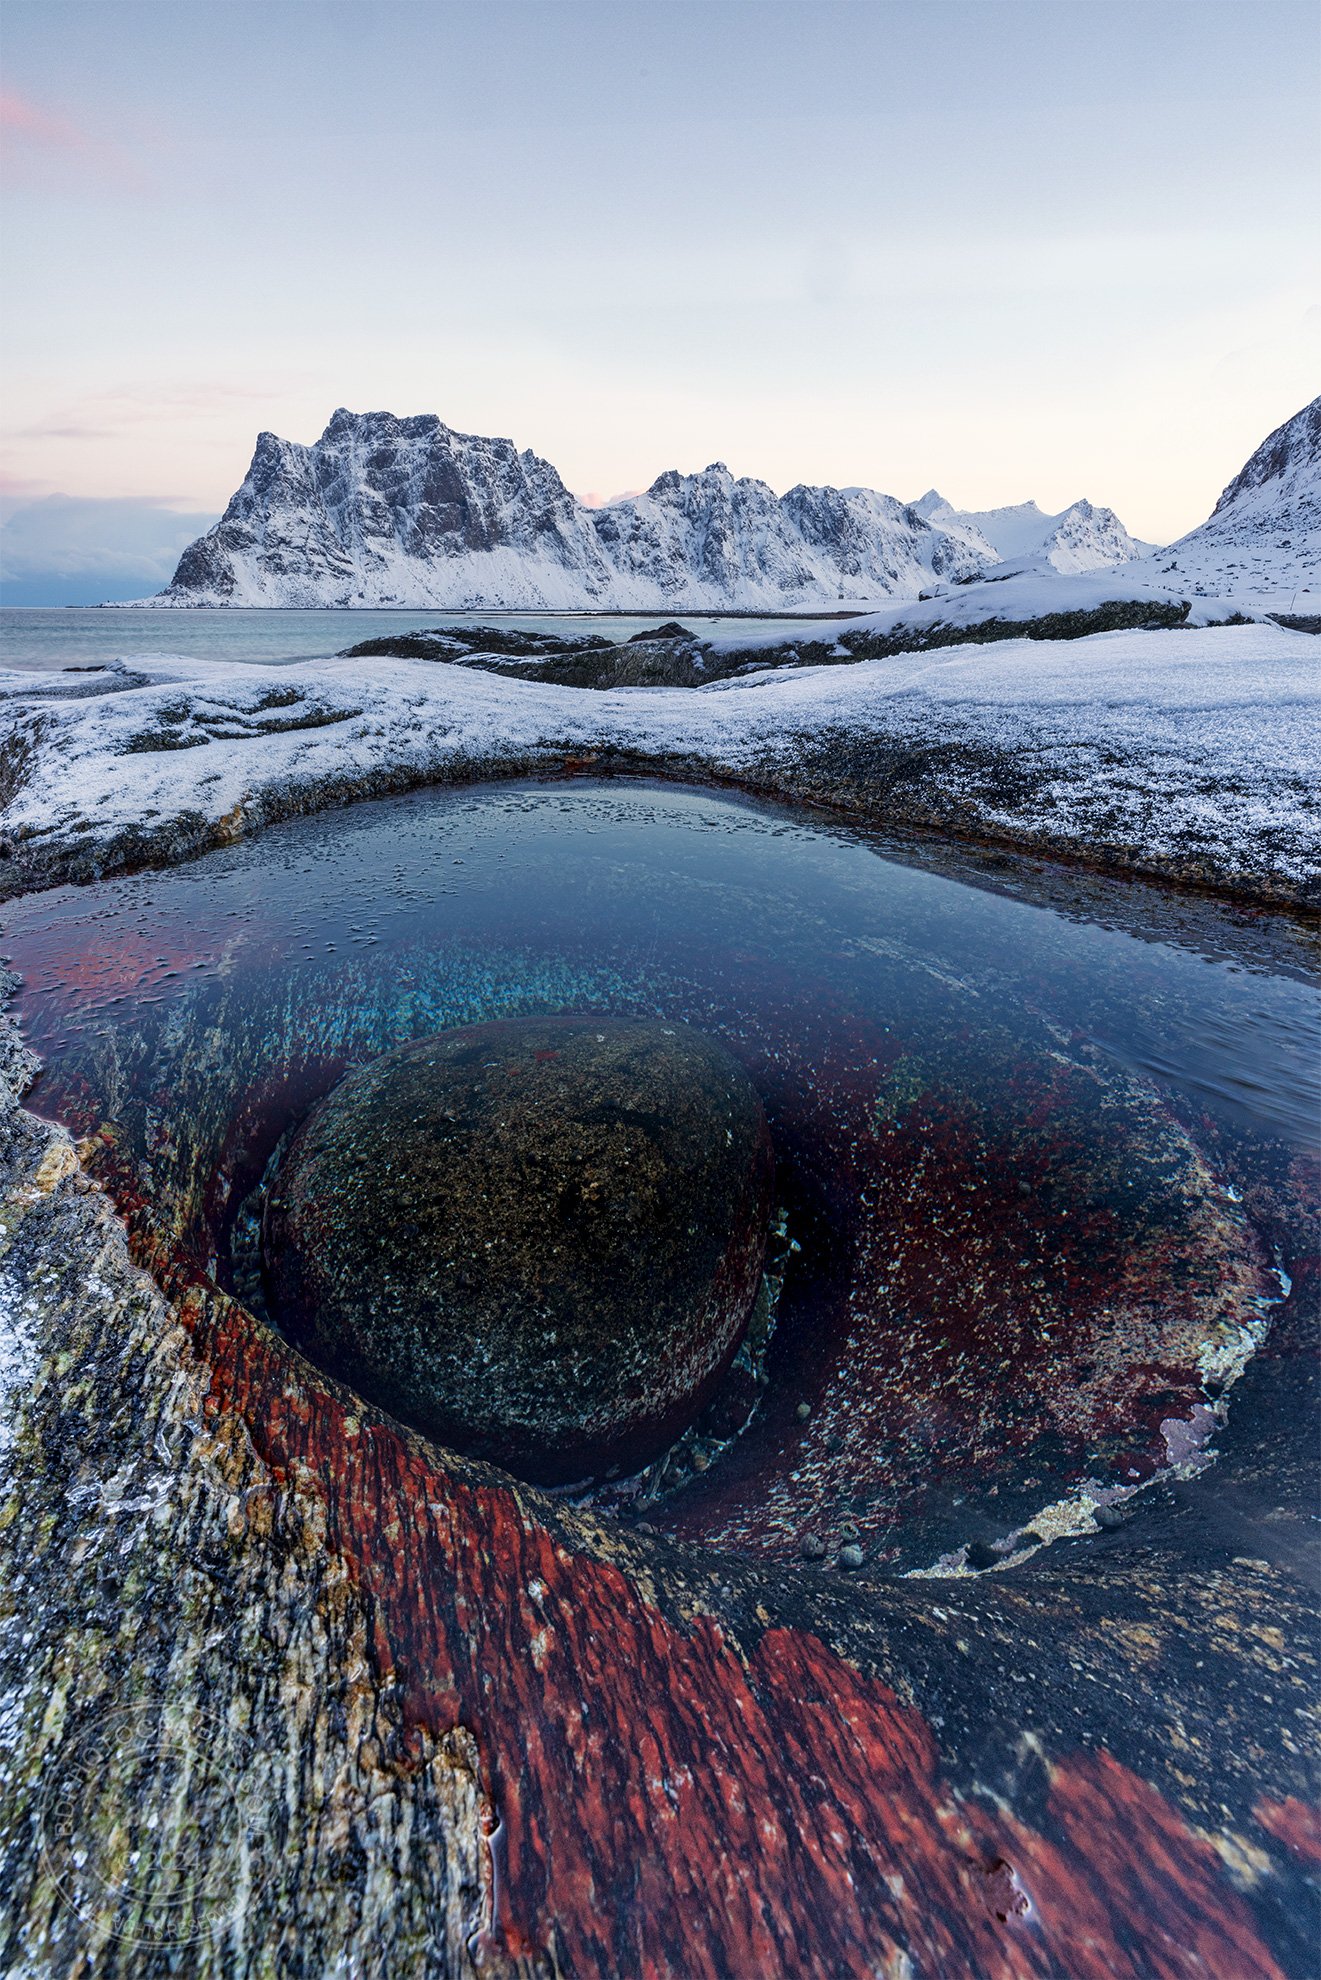
The “Dragon’s Eye”: a colorful tidal pool within a rock basin along an Arctic beach

Foreground elements need not be complicated: A snow-covered bridge creates leading lines toward the subject.

Each day I went out for sunrise and sunset, at times returning to the same locations to capture the same scene in different light conditions. After dinner, I monitored the aurora forecasts and waited for my guide to confirm shooting time if we were to get lucky with a light show. Aurora chasers know that clouds are the enemy, but even on clear nights, we still need good solar activity to see the northern lights.

This makes it very different from Milky Way photography: in the right time of year, all you need is a dark sky location, clear weather, and you are guaranteed to see the Milky Way. (Ok, it’s a bit more nuanced than that: certain latitudes won’t see it, and you need to know what time of night to be out, but for the most part the Milky Way is a slam dunk as long as the weather cooperates. The aurora is much more elusive.)

The afternoon weather was clear and expected to hold overnight. Solar activity forecasts changed suddenly from a KP 2 to a KP 5 (a higher KP indicates a greater probability of seeing the aurora). My aurora forecast app displayed live webcams picking up sightings in Finland and Sweden — things were looking promising. And then, at about 10:30 p.m., the northern lights arrived right where I was waiting for them. I worked with a few different compositions and took time to experiment photographing with my iPhone in addition to my primary camera

This shot required two exposures: one for the northern lights and a second to mute the harsh streetlights in the fishing village

Like other night sky images, the northern lights require a long exposure but there is a point of diminishing returns if the shutter speed is too long. Because the lights are a moving phenomenon, too long of an exposure will result in a cloudy green sky and potentially over-exposed image. I found that the sweet spot was between 6 and 13 seconds depending on what the lights were doing. Aperture generally was left wide open on my Canon EF 16-35 F/2.8L III lens. Of course night sky photography and long exposures require a sturdy tripod and I was quite pleased that even in strong winds my Gitzo carbon fiber tripod provided a stable platform.

In astrophotography, artificial light can become blown out even if the sky is correctly exposed and this was absolutely the case as I photographed the aurora over a fishing village. The trick here is to take at least two exposures: one for the sky and at least one for the village houses in order to mute the strong effect of the streetlights. The raw images are combined in post-processing to create a single image. This is a common technique in landscape photography when there is a high dynamic range of light.

Above: iPhone photo of the arriving aurora. Phone cameras have come a long way!

The portfolio shot: aurora borealis over Norwegian fjords

Aerial shot using a drone. Most drone enthusiasts go for shots from this perspective, but the drone can offer incredible opportunities to shoot anywhere you can’t plant your feet.

Prior to my trip I applied for a European drone license and passed the course to fly legally in most European countries. When the winds were calm, I sent up the drone for some aerial images and footage. One of my favorite photos was achieved flying quite low — just a few feet above the water. Many drone enthusiasts use it too narrowly as a device only for aerial perspectives, but I see it as a tool to take photos anywhere I can’t plant my feet. Today’s drones fold up and fit comfortably in a backpack and some of them like my DJI Mavic 3 are equipped with excellent cameras!

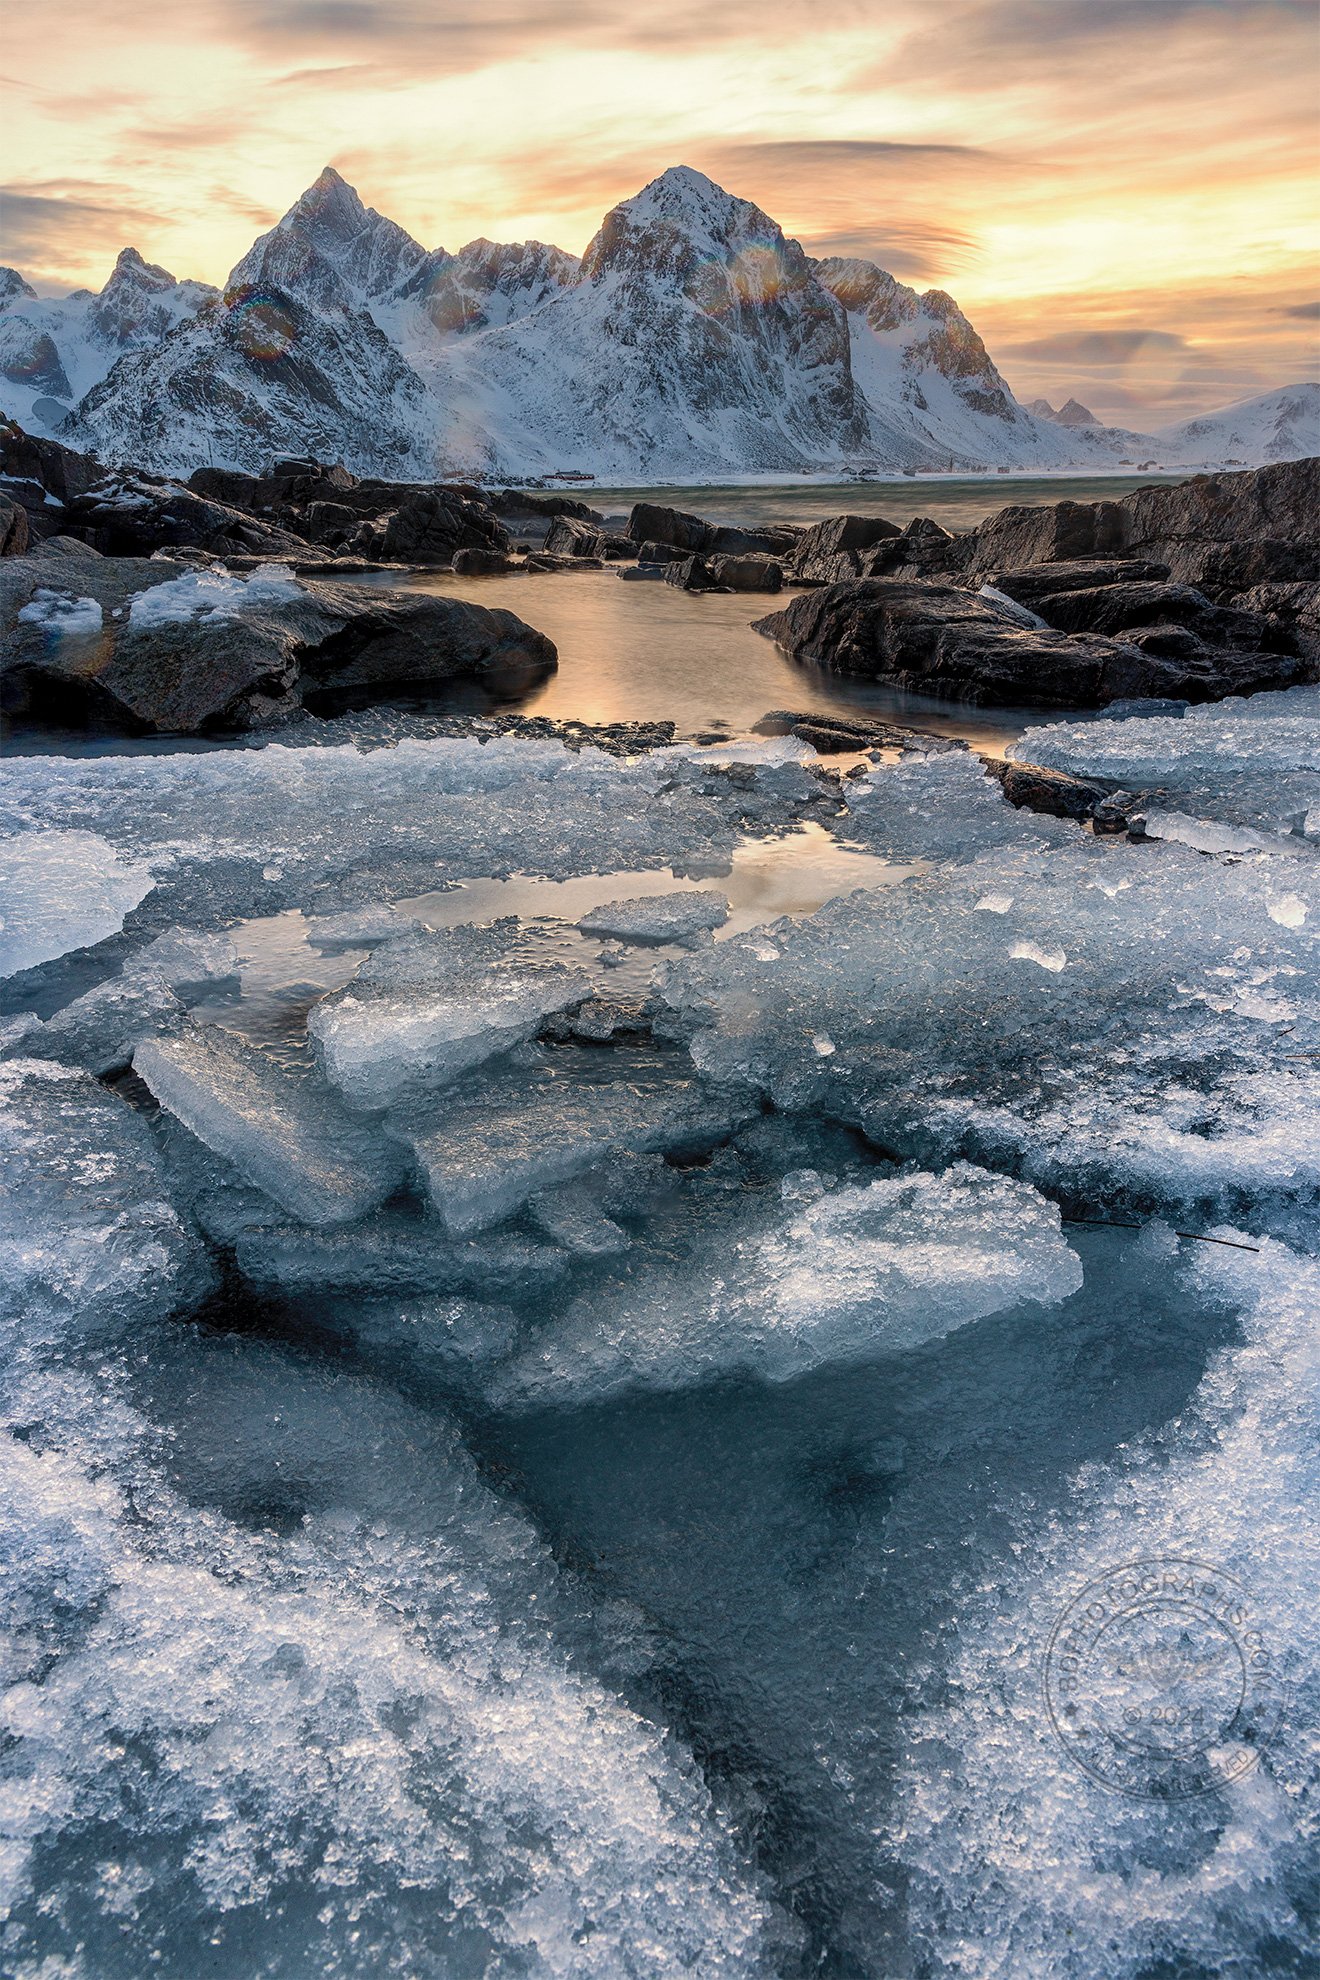
Ice shards and snow melt make compelling foreground subjects. Leading lines and geometric shapes are constantly changing as fresh storms freeze and thaw the shoreline.

In the daylight hours I sought interesting compositions to showcase the Arctic landscape. The snow-draped fjords are stunning by themselves, but adding a good foreground element can take a photo from pleasing to spectacular. It’s easy to overthink the foreground, but a basic subject is all that is needed. Along the beaches I searched for ice shards and geometric shapes. Other times a simple fisherman’s cabin provided a humble contrast to the powerful and majestic mountains. 

As the week developed, the weather grew progressively worse and I realized how lucky I was to see the aurora. And in the weeks after my visit, aurora sightings were scarce and much of the snow gave way to rain, washing away the magical winter essence. Outdoor photography is almost exclusively the domain of natural light and this means surrendering to whatever nature provides on a given day. Though my previous visits to northern latitudes did not yield successful aurora images, persistence and patience paid off: this trip was one for the books.

Tropical oasis? The water color on sunny days resembled the Caribbean.


Return to Little Cayman

I recently returned to Little Cayman on a trip with my home-base dive shop, Atlantis Aquatics. Little Cayman is one of my favorite dive destinations and truly is a showcase of the Caribbean’s greatest hits: sea turtles, groupers, stingrays, nurse sharks, and reef sharks are common sightings, as are smaller critters like spotted drums, sea slugs, “disco” fish, and cleaner shrimp. 

Most people who visit the Cayman Islands stay in Grand Cayman, the largest and most commercialized of the three islands. Just eighty miles east of Grand are the sleepier sister islands of Little Cayman, and 15 miles further, Cayman Brac. They are remote and undeveloped: no corporate hotel chains, Starbucks, or movie theaters here. These destinations are for people who want to scuba dive, fish, or just disconnect. 

Flying to Little Cayman reminds me of travel in the Alaskan bush or the Costa Rican rainforest - small props landing on remote airstrips

Visitors arrive in Little Cayman on a deHavilland Twin Otter— a dual-engine, 18-seat, propeller plane — that departs Grand Cayman and lands thirty minutes later on a tiny airstrip nestled between mangroves and natural coastline. One narrow ring road traces the circumference of the island — you could drive it potentially without seeing any other vehicle traffic. 

For this trip I opted to keep the photography kit relatively simple with a one lens wide-angle setup only: my Canon EF 16-35mm F/4L IS lens on a Canon R5 body. I took it underwater in a Nauticam housing with two Sea & Sea strobes. (All of my gear, incidentally, is purchased at Backscatter — and they have presence teaching underwater photography courses at the dive resort where I stayed on Little Cayman.) Although there is plenty of macro life to see in Little Cayman, I find that diving with a group of divers following a dive guide means we don’t spend much time in any given spot, which makes macro photography difficult. Going with a group of other photographers (or diving with only your buddy) is a much better arrangement for macro photography. (Want to learn more about wide-angle vs. macro photography? Check out this video)

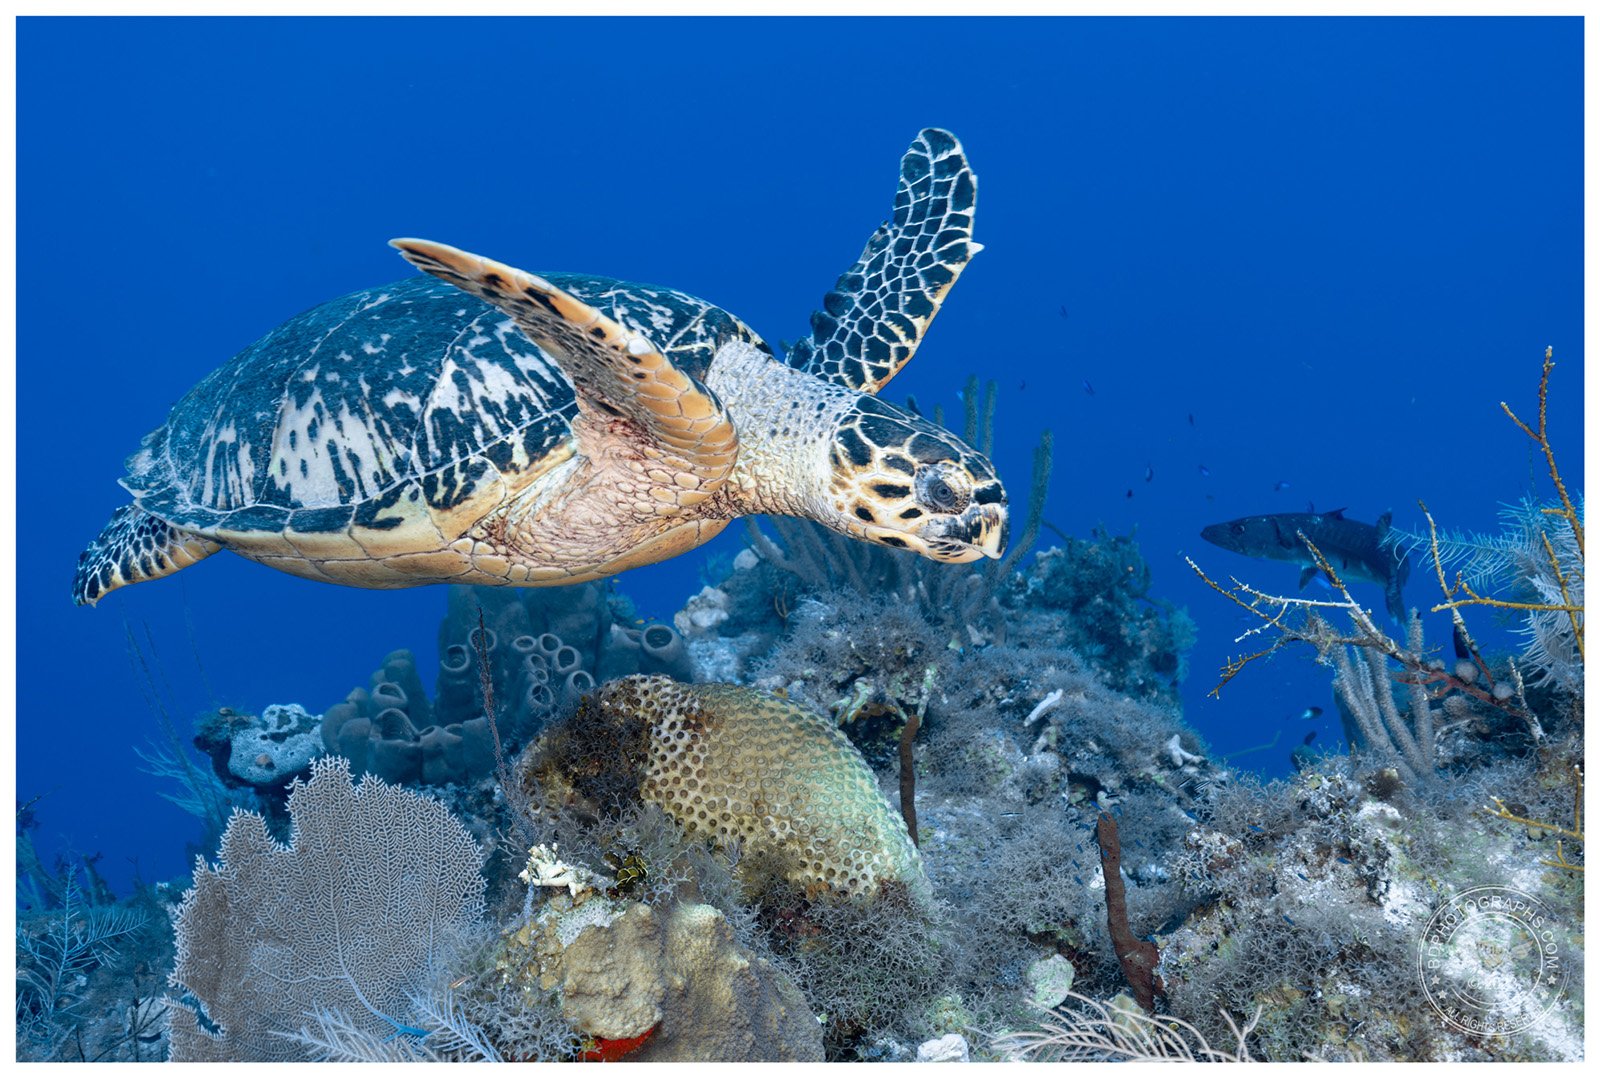
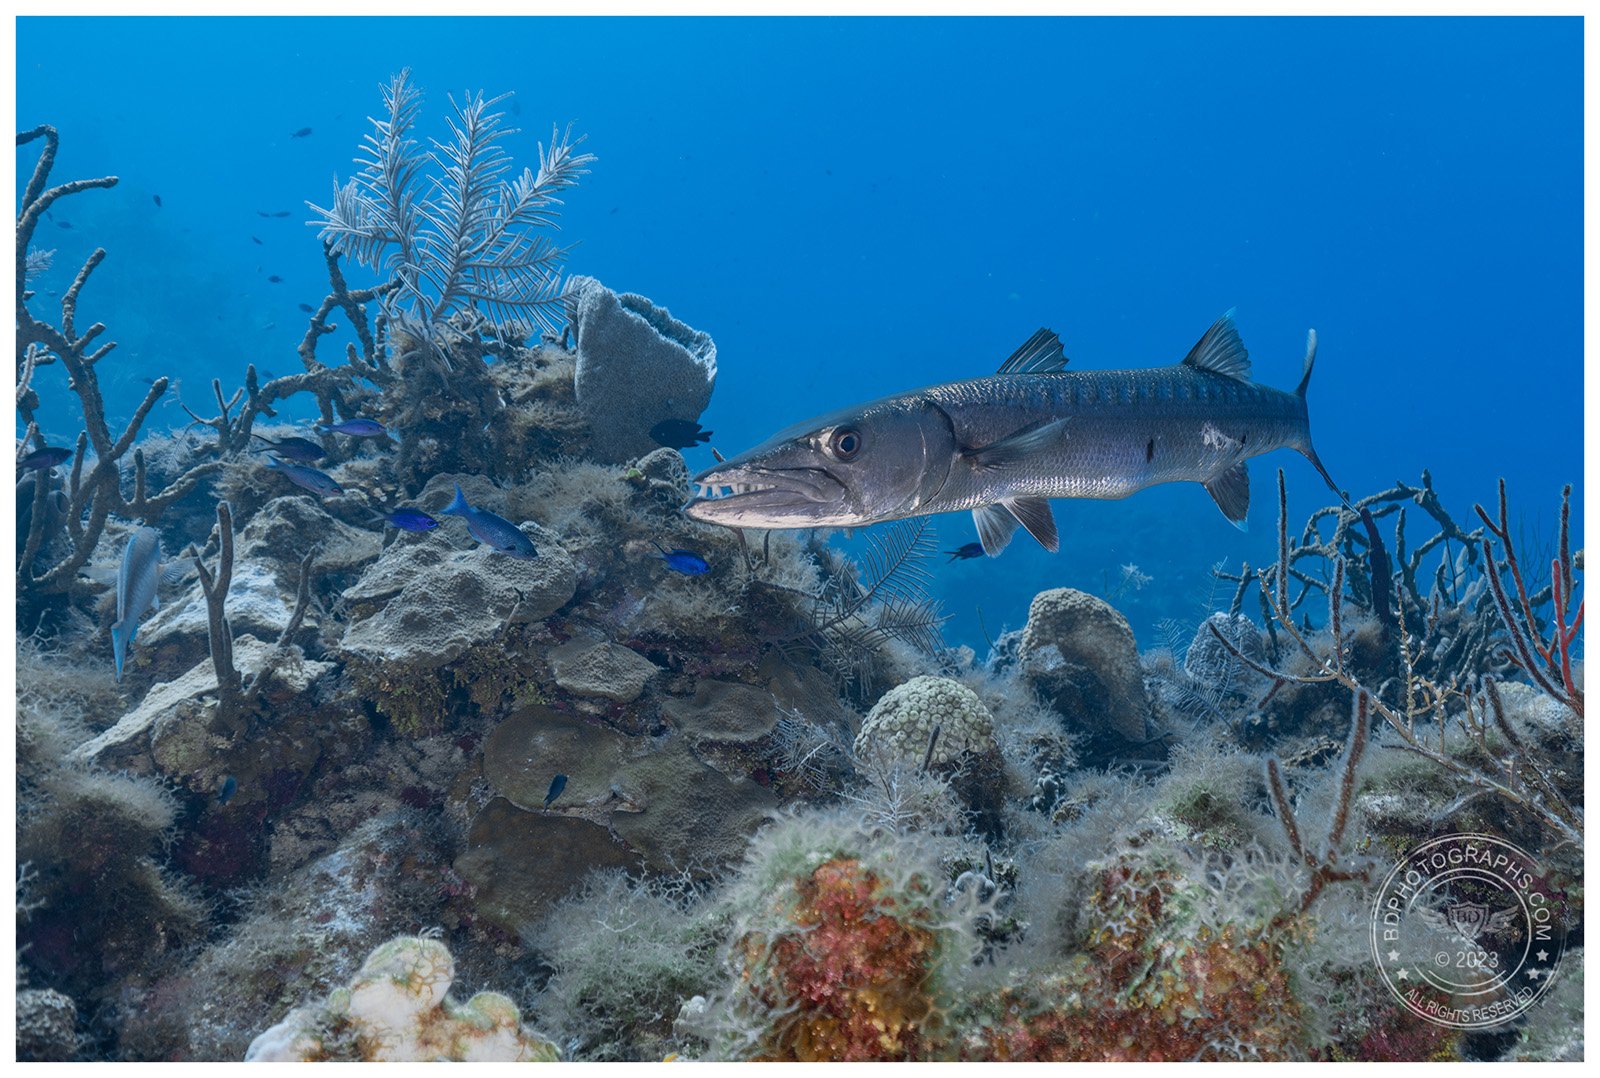
One of my goals on this trip was to seek strong subject separation. I have many photos of turtles and barracuda blending into the reef, so on this trip I was hoping to make them “pop” more distinctly in my images. Too often turtles photographed against a reef are overtaken by the busy background, almost camouflaged into the complex array of corals.

A hawksbill turtle flies over the reef. I like this image because there is subject separation so the turtle really stands out. It also clearly shows action and movement. 

A great barracuda displays its menacing teeth. Once again, there is good subject separation so it does not blend into the reef. This was shot on the edge of one the of many coral fingers 

To achieve subject separation on the reef, the photographer must be lower than the subject and must approach at an upward angle — not easy to do without trampling on the fragile corals, which is of course absolutely forbidden. The trick to this type of shot is to look for subjects near the edge of a slope, coral head, or wall where you can easily dive lower than your subject without touching the reef. 

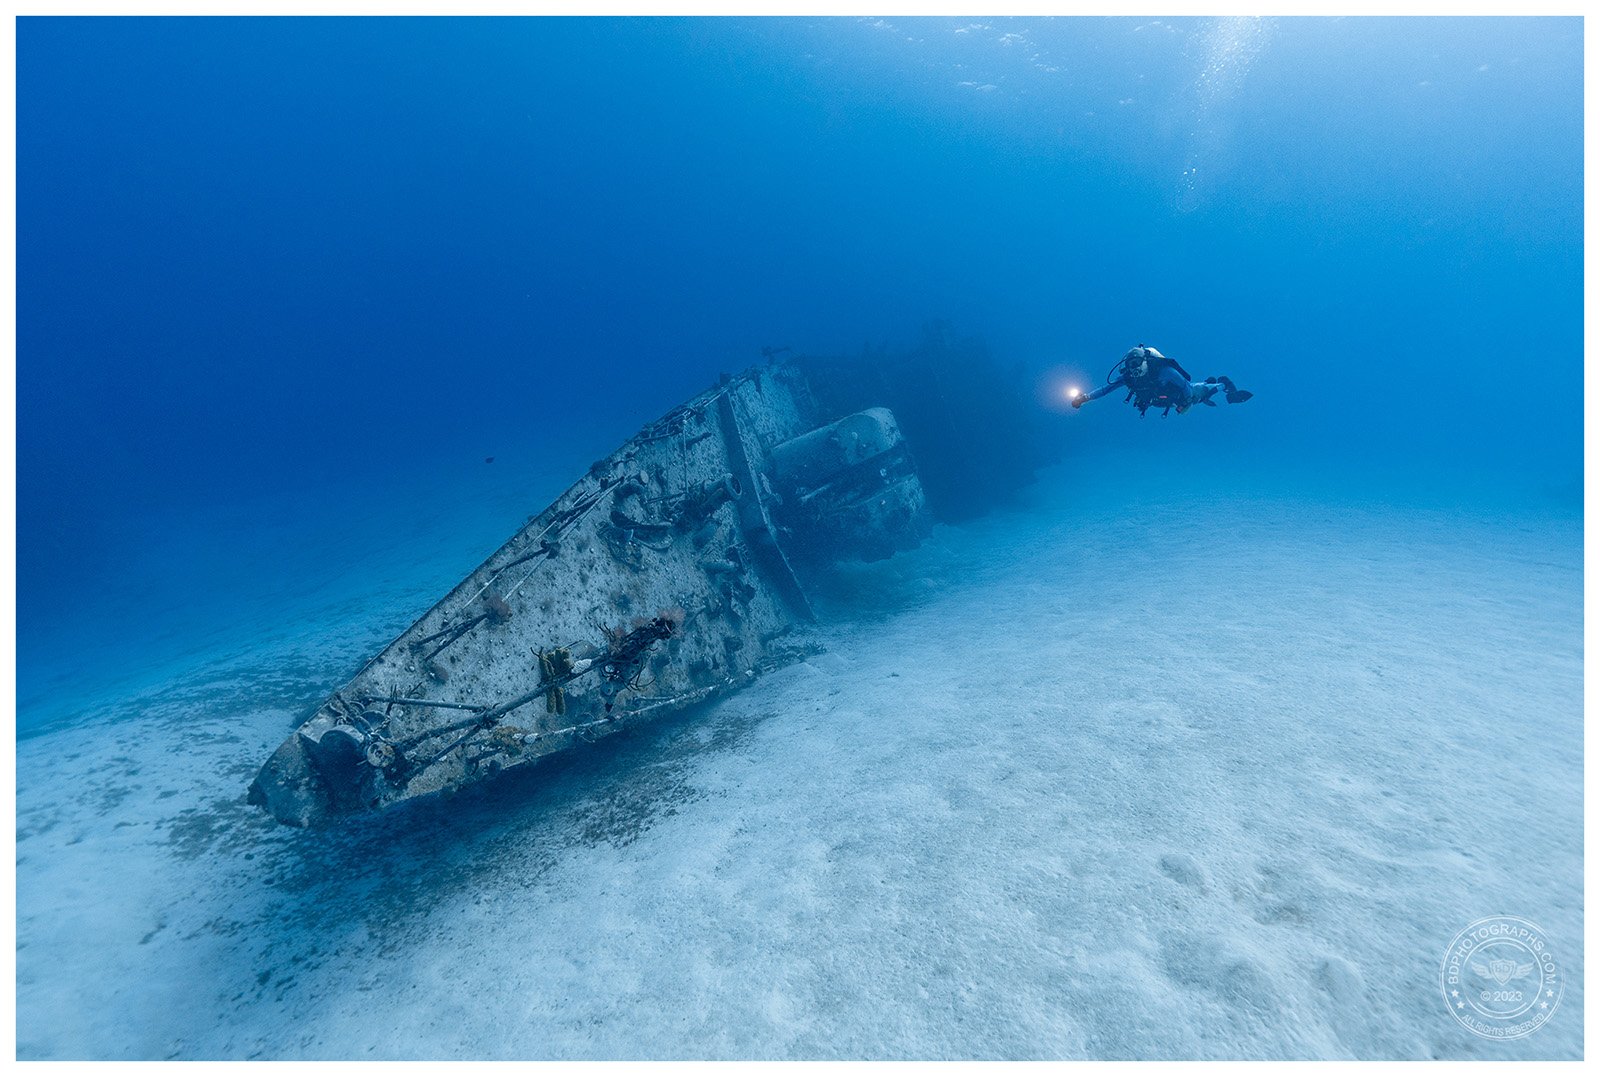
Another goal was to visit a well-known shipwreck in Cayman Brac. On my last visit to Little Cayman this wasn’t an option, so I was excited when the captain proposed a trip (weather permitting) out to the Brac to dive this wreck. Transit time was about 50 minutes in moderately choppy seas, but the bouncy ride was well worth it. The M/V Keith Tibbets, formerly a Soviet destroyer built for Cuba, rests in clear water on beautiful reflective sand. The shipwreck is extremely photogenic, with its forward turrets clearly visible. It is about 90 feet down to the sand, but divers who don’t want to go deep can explore the shallower starboard side at about 60 feet.  

The M/V Keith Tibbets, formerly a Soviet destroyer built for Cuba, was a highlight of this dive trip

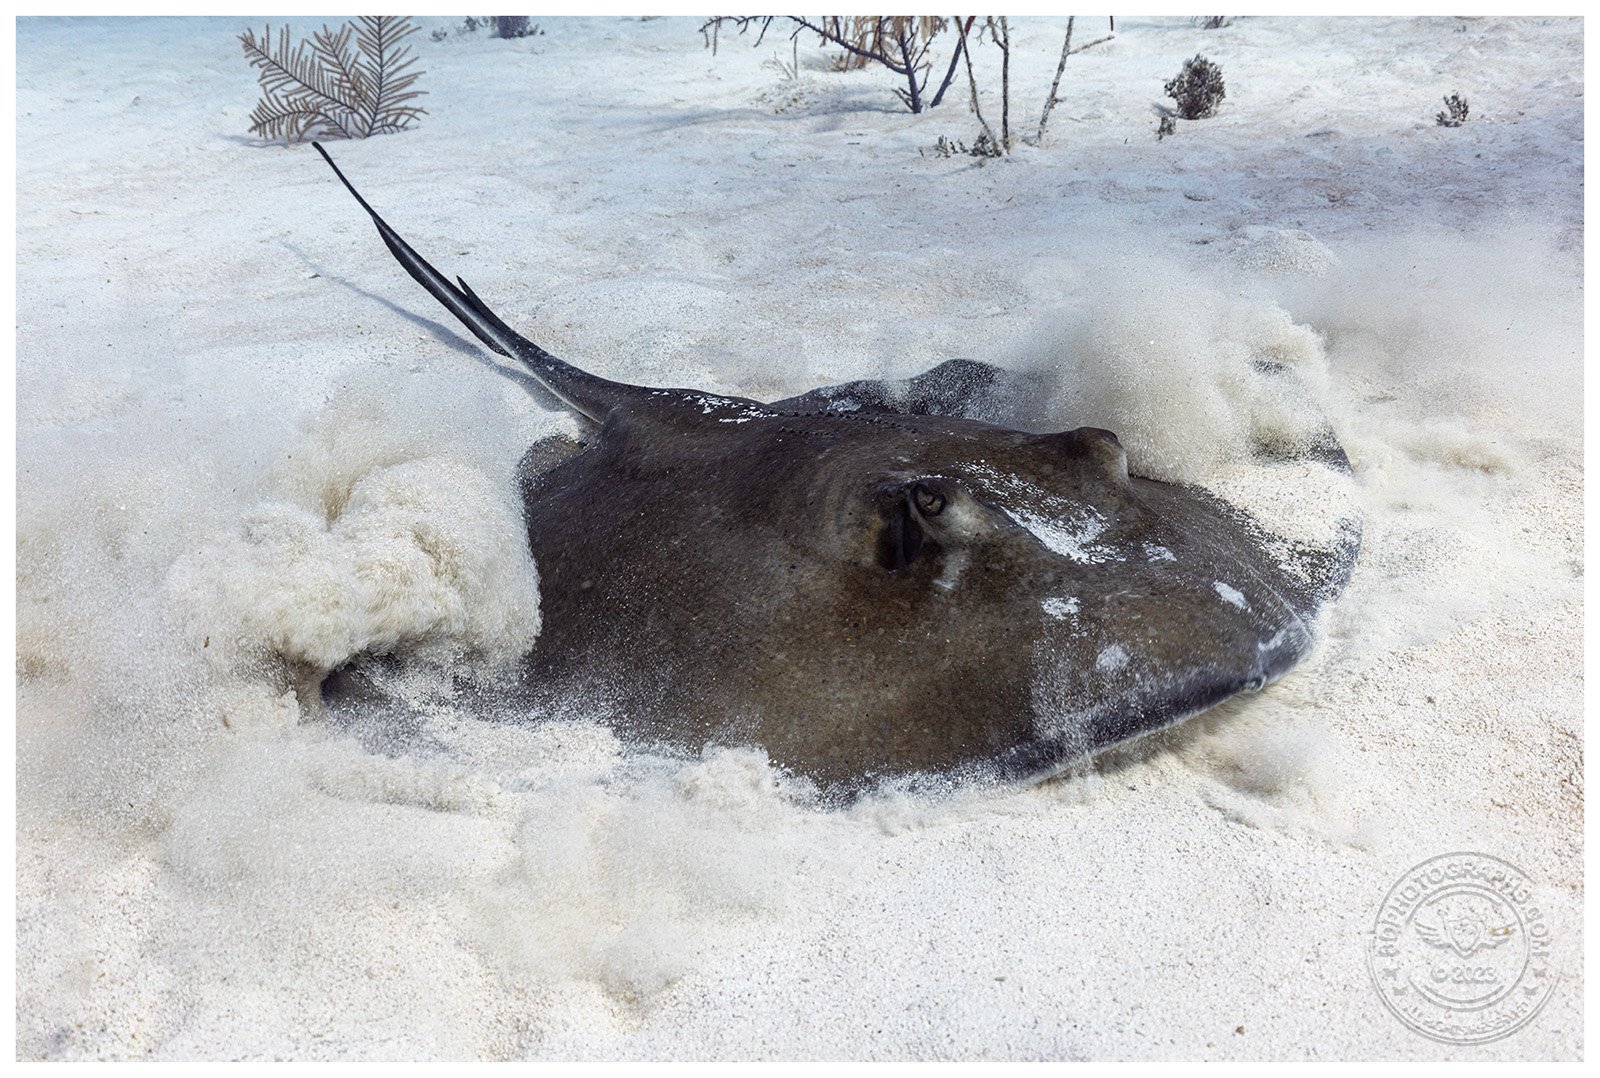
One topic of debate in diving is whether it is permissible to kneel in the sand. Some dive operators allow it as long as it is done with care; others do not permit it and ask divers to remain buoyant above the bottom. On this trip we were asked not to kneel on the bottom so stingray shots were a bit more challenging, but not prohibitively so.

This was my favorite stingray encounter. It’s fairly common to see rays gliding across the sand, or buried on the bottom, I caught this ray in the process of swirling up the sand and digging itself in. 

We had several stingray encounters, and it is remarkable that each ray had its own personality. One was feisty and irritated, more so by the bar jack that was tracing its every movement than any encounters with us. Another was skittish and seemed to take off whenever we got too close. And then there were two others who were very tolerant of our presence, posing in the sand unencumbered even as a group of three of us approached with our cameras. It truly is a pleasure when a subject is cooperative, and it’s no surprise that the best images are achieved when the animal is calm and unbothered by our interactions. 

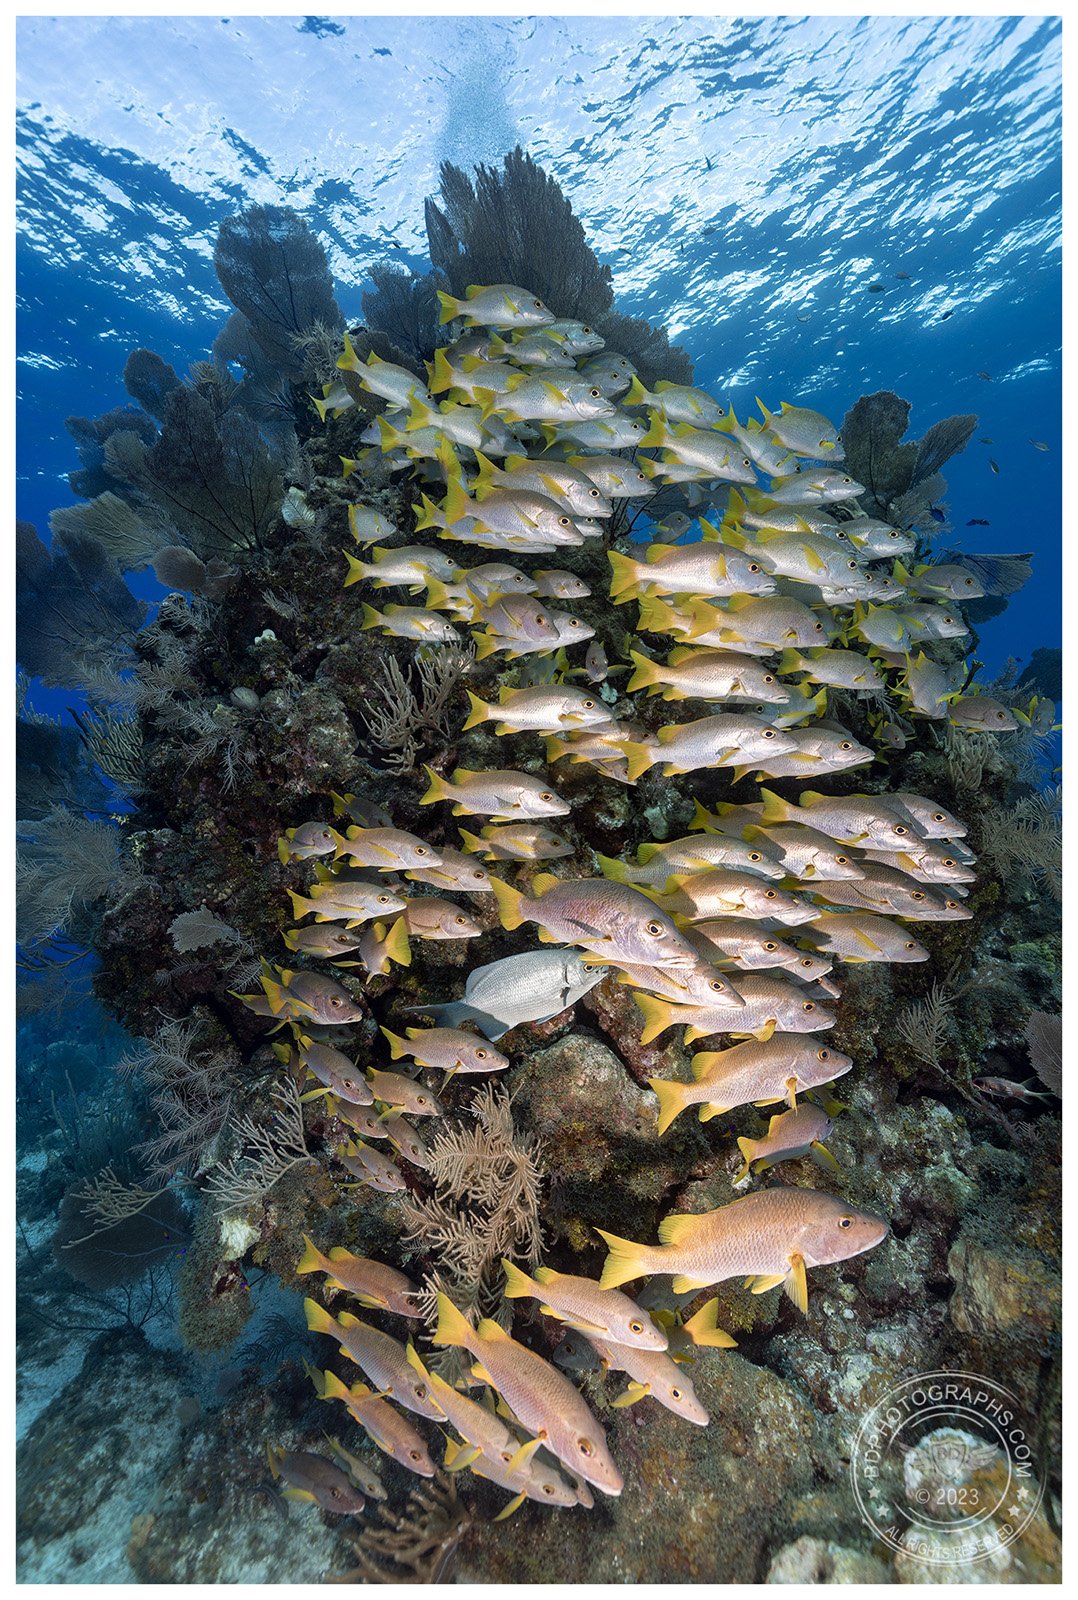
“Schoolmasters’ Tower” is my favorite image from this trip. Here schoolmaster snapper (Lutjanus apodus) rest in the lee of a coral head. If you look closely you can spot a Bermuda Chub and a squirrelfish tucked in among the snapper.

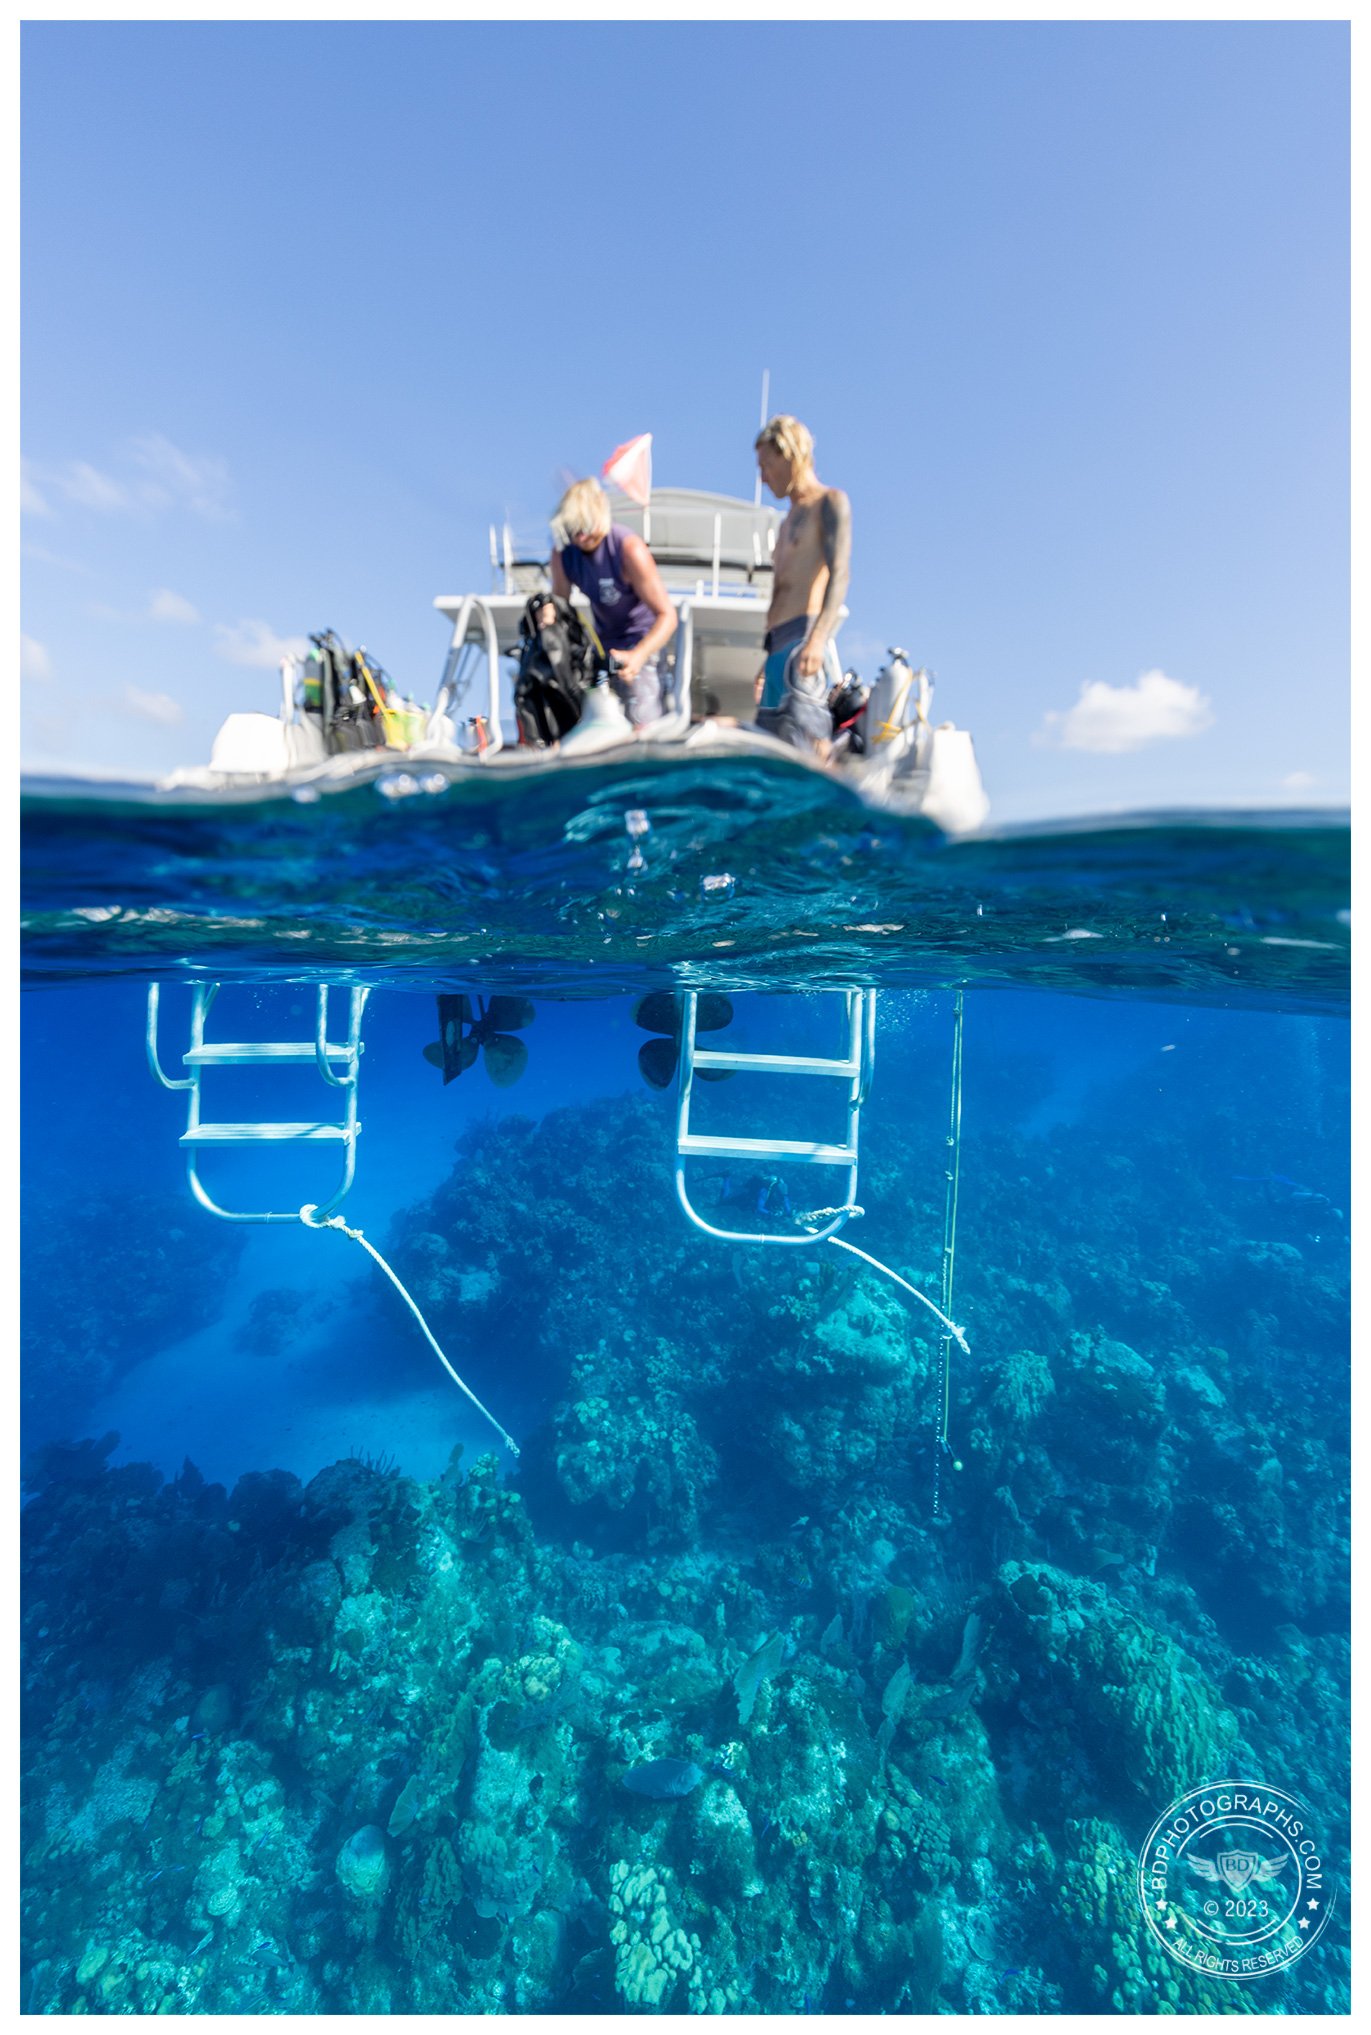
This is really a snapshot split, meant to document the experience of getting back on the boat. Divers are privileged to see a completely different world underneath the surface

With the exception of south Florida, I rarely revisit dive locations within 5 years — there’s always somewhere new or different to explore before recycling old favorites. Little Cayman is an exception, and will continue to be owing to its reliability as an outstanding Caribbean dive destination. See you again soon!


If you are interested in learning about underwater photography, or experiencing some close-up behind-the-scenes encounters with sharks, dolphins, crocodiles, check out my YouTube channel.

Polar Bears!

They appear in Coca Cola ads every year as the holiday season approaches. They are a symbol of the arctic and a poster child for climate change campaigns. They are magnificent animals, formidable predators, and incredibly well-equipped to survive in the most unforgiving latitudes of the planet. Join me in this video blog to photograph the undisputed king of the north: the polar bear.


Interested in starting a website or blog? How about a place to display your photos online? I use Squarespace as my platform. Get started for free — click the image below.


If you’re interested in photography gear and supporting small business, check out Adorama

Haunting Imagery for Halloween (and All Year Long)

There are definitely subtle nods to urban exploration (urbex — or more accurately, rural exploration i.e. rurex) in my portfolio. The use of abandoned homesteads, shipwrecks, and railroads makes for great mood and compelling subjects. The center image of an abandoned mountain railway, taken in Taiwan, is one of my most popular. 

Urbex.jpg

Abandoned and macabre places have long been a source of fascination to me, especially as someone who grew up a fan of horror thrillers from Hitchcock, Stephen King, and just about anything from the ‘80s. In the latest behind-the-scenes video I’m going to share some images not typically showcased in my portfolio — images that are grittier and outside my normal color palette.

We’ll photograph inside an abandoned theater, visit a creepy graveyard, and check out Stephen King’s house.

We’ll also discover the best lens for photographing abandoned places and learn the importance of applying contrast to grayscale images. As always the video is short, densely packed with content, and relatively non-technical. Enjoy!

Explore different ways to make haunting images in this episode. We'll visit an abandoned theater, forgotten railroads, creepy cemeteries, and even photograph Stephen King's house. We'll take long exposures in near darkness, apply creative techniques, and just have a wickedly good time.

Silky Smooth Water Effect

Prerequisites:

Understanding the exposure triangle

Experience in ‘Manual’ mode

You can see it in fine art photographs everywhere: a smooth, dreamy quality to a body of water. Unlike the harsh and crunchy appearance of most smartphone snapshots, the water in these fine art images takes on a fantasy-like artistic look. How do photographers get that magical silky effect? It’s actually quite simple: with a medium to long exposure, we can blur the movement of the water into a velvety texture. Today we’ll look at how exactly to “soften” moving water: the gear needed to pull off the shot, just how “long” the exposure needs to be in different situations, and some side effects and pitfalls to avoid in the process. 

The East River in New York City is tidal and always moving, even on the calmest day. Softening the water requires a long exposure of 15 seconds or more. Notice the blurring effect the long exposure has on the moving clouds. Canon 5D III | EF 24-70 f…

The East River in New York City is tidal and always moving, even on the calmest day. Softening the water requires a long exposure of 15 seconds or more. Notice the blurring effect the long exposure has on the moving clouds. Canon 5D III | EF 24-70 f/2.8L II | Aperture f/16 | Shutter 60” | ISO 100

GEAR

The technique to soften water is in controlling the shutter speed and the most important item aside from your camera and lens is a sturdy tripod. You may also want to bring a polarizer and a neutral density filter, especially for daytime shots. A remote shutter trigger is a convenient tool and a back-saving device when your camera is positioned low to the ground. Finally, a rain cover for your camera is good idea when shooting by water — especially near waterfalls or breaking waves. 

HOW LONG IS “LONG”? 

Sure, we know the trick to softening water is in a slow shutter speed and long exposure but what exactly do we mean by “long”? That answer really depends on a number of variables, but as a rule of thumb, any shutter speed that is too slow for a hand-held in-focus shot can be considered a long exposure. I can see some of you rolling your eyes — “just give me a number!” — so for the sake of simplicity let’s say 1/15 of a second up to 1 second is a medium length exposure, and anything over 1 second is “long”. 


“That’s quite a range” (another eye roll) — it sure is, and there’s a certain amount of experimentation needed to arrive at the optimal shutter speed for a given shot. It’s also the case that two exposures of the same scene can look quite different even at the same shutter speed.

TECHNIQUE

A good tripod is essential to pulling this off, so ensure your camera is mounted and stable before you begin. Put your camera in manual mode and set the aperture to a narrow f-stop such as f/16 or f/22. Set your ISO to its lowest native setting (100 for most Canon cameras; 64, 100, or 160 for different Nikon bodies). Evaluate how fast the water is moving relative to the camera and dial in a shutter speed of a few seconds to start. Look at your exposure meter — if the scene is underexposed, you can open the aperture a bit wider or increase the ISO. If the scene is overexposed, shorten the shutter time a bit. In bright daytime scenes it may be necessary to use a neutral density filter in order to achieve the desired shutter speed. Adjust the shutter speed until the water is softened to taste. Take several exposures and choose the best one.

The “crunchy” water look is typical of smartphones and cameras in Automatic mode. The camera is shooting with a fast shutter speed in order to ensure a sharp image — which is the right thing to do in most situations. It doesn’t know we want an artis…

The “crunchy” water look is typical of smartphones and cameras in Automatic mode. The camera is shooting with a fast shutter speed in order to ensure a sharp image — which is the right thing to do in most situations. It doesn’t know we want an artistic effect in the water. Sony QX100 with iPhone | Aperture f/4 | Shutter 1/640 | ISO 160

The key to softening water is to understand how quickly the water is moving relative to your point of view. When the relative movement is fast, you don’t need as long of an exposure because you capture more movement (and thus blur) in a given amount of time. When the water movement is slow, a longer shutter speed is required to smooth out the texture. Be careful to consider the relative movement of the water, not the objective speed. For example, a moderately flowing stream might be visually quite rapid if you position the camera low and close to the water. In other words, the water moves across the frame quickly. On the other hand, a lake in the background of the image could be churning in the wind, but because of it’s distance, the water is not moving much at all relative to your point of view. This would require a lengthier exposure. 

Fibrous streaks are a variation of softened water. In this image the camera is positioned on the bank low and just inches from the gushing stream. A modest shutter speed of 1/5 of a second is all it takes to achieve the silky tendrils in the image. …

Fibrous streaks are a variation of softened water. In this image the camera is positioned on the bank low and just inches from the gushing stream. A modest shutter speed of 1/5 of a second is all it takes to achieve the silky tendrils in the image. A CPL filter (aka circular polarizer) will help to reduce the reflective glare on wet rocks. Canon 5DSR | EF 24-70 f/2.8L II | Aperture f/22 | Shutter 1/5” | ISO 100 | B&W Circular Polarizer

Sometimes we prefer a more fibrous look to the water, especially in rapids and waterfalls. The recipe for this effect is still in the shutter speed, but in this case longer is not necessarily better. You want to blur the water just enough to soften the crunchy look at you would achieve with a fast shutter speed. A medium shutter speed — somewhere between 1/15 and 1 second will usually produce this effect. 

Less is more: a long exposure will turn the stream into a milky mess and potentially blow out the highlights. This image was shot with a 1 second exposure — not especially long — and has already exceeded the ideal shutter speed. The mill is well exp…

Less is more: a long exposure will turn the stream into a milky mess and potentially blow out the highlights. This image was shot with a 1 second exposure — not especially long — and has already exceeded the ideal shutter speed. The mill is well exposed but the water is too frothy and some of the trees in the background show motion blur. Sony A7RII | 24-70mm f/4 | Aperture f/22 | Shutter 1” | ISO 100

SIDE EFFECTS

Long exposures can sometimes result in odd or undesirable effects in images. Remember that a long exposure will create motion blur — this is how we soften water — and that blur will affect any moving object in the image. On a windy day bushes and trees will sway, along with flags, traffic lights, boats, and even skyscrapers! Moving cars will appear as streaks of white and red when their lights are on. And clouds will lose their shape and become foggy strokes of whitish gray (sometimes this adds to the dreamy effect we achieve in softened water). There is a relatively easy way to control these unwanted effects, but it requires some work in post processing. First take the photo at the desired shutter speed to properly soften the water. Then, take a second photo with a much faster shutter speed (you will have to increase your ISO and/or widen your aperture) to ensure there is no unwanted blur in the trees / boats / moving items. Combine the two images in post processing. 

Remember that softening water is an artistic technique that deliberately stretches the shutter speed. Have fun experimenting and soon you’ll enjoy the pleasing and professional looking images you create.