outdoor photography

The Aurora Strikes Back!

On October 10, 2024, as predictions of a strong geomagnetic storm played out, sightings of the northern lights (aka aurora borealis) were reported throughout continental Europe in places that do not normally witness this amazing phenomenon. It became apparent that we were in for a treat in the US too. 

Five months earlier an unusually strong solar storm dazzled much of the temperate and even tropical latitudes with amazing auroras — in the US, the northern lights could be seen as far south as Florida! Unfortunately, while that spectacle unfolded, I was in Utah under overcast skies and unable to witness the magic. Earlier in the year I photographed the aurora over snow-covered fjords in Norway, so I was especially excited, and then disappointed, at the missed opportunity much closer to home. 

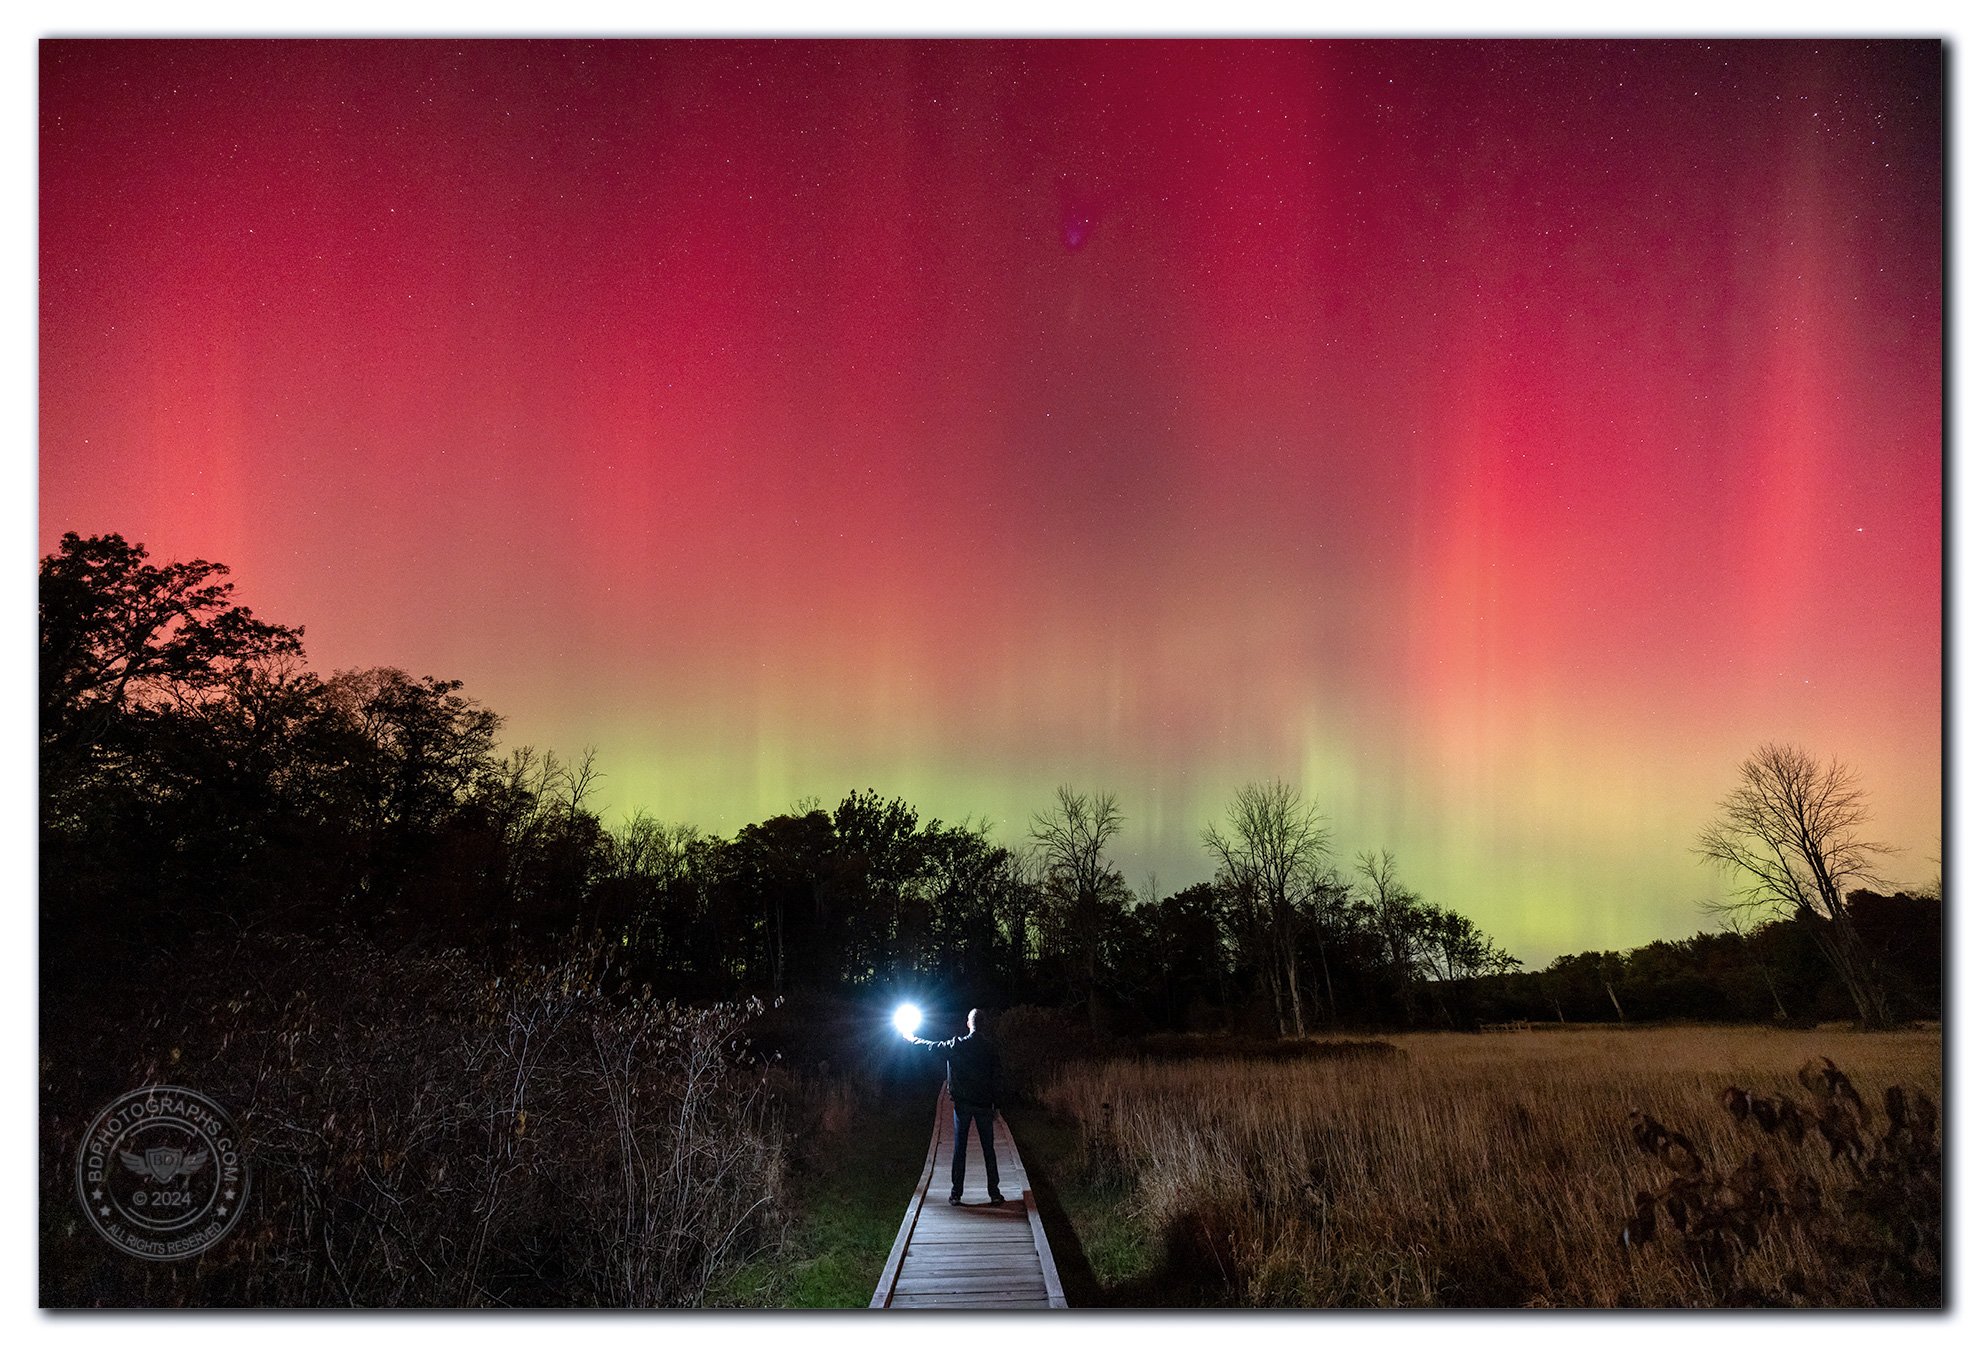
I photographed this “astro-selfie” in New Jersey under an incredible aurora borealis

As the October solar storm developed, I made preparations to shoot after sunset. The weather forecast called for clear skies — an auspicious start to the evening. In the New York City area it is difficult to find truly dark skies: the best options are usually the beaches of Long Island or the Jersey Shore, but those face south and east … 

So I traveled 45 miles northwest of Manhattan to a section of the Appalachian Trail that features a raised boardwalk over marshy grasslands. The trail snakes around a valley in the New York-New Jersey Highlands region, near the border of the two states. I chose this area for its meandering path and largely open field, providing multiple viewpoints and alignments in different directions. 

I arrived at about 9:00 PM to a crisp 45ºF. Here is how the aurora developed that evening: 

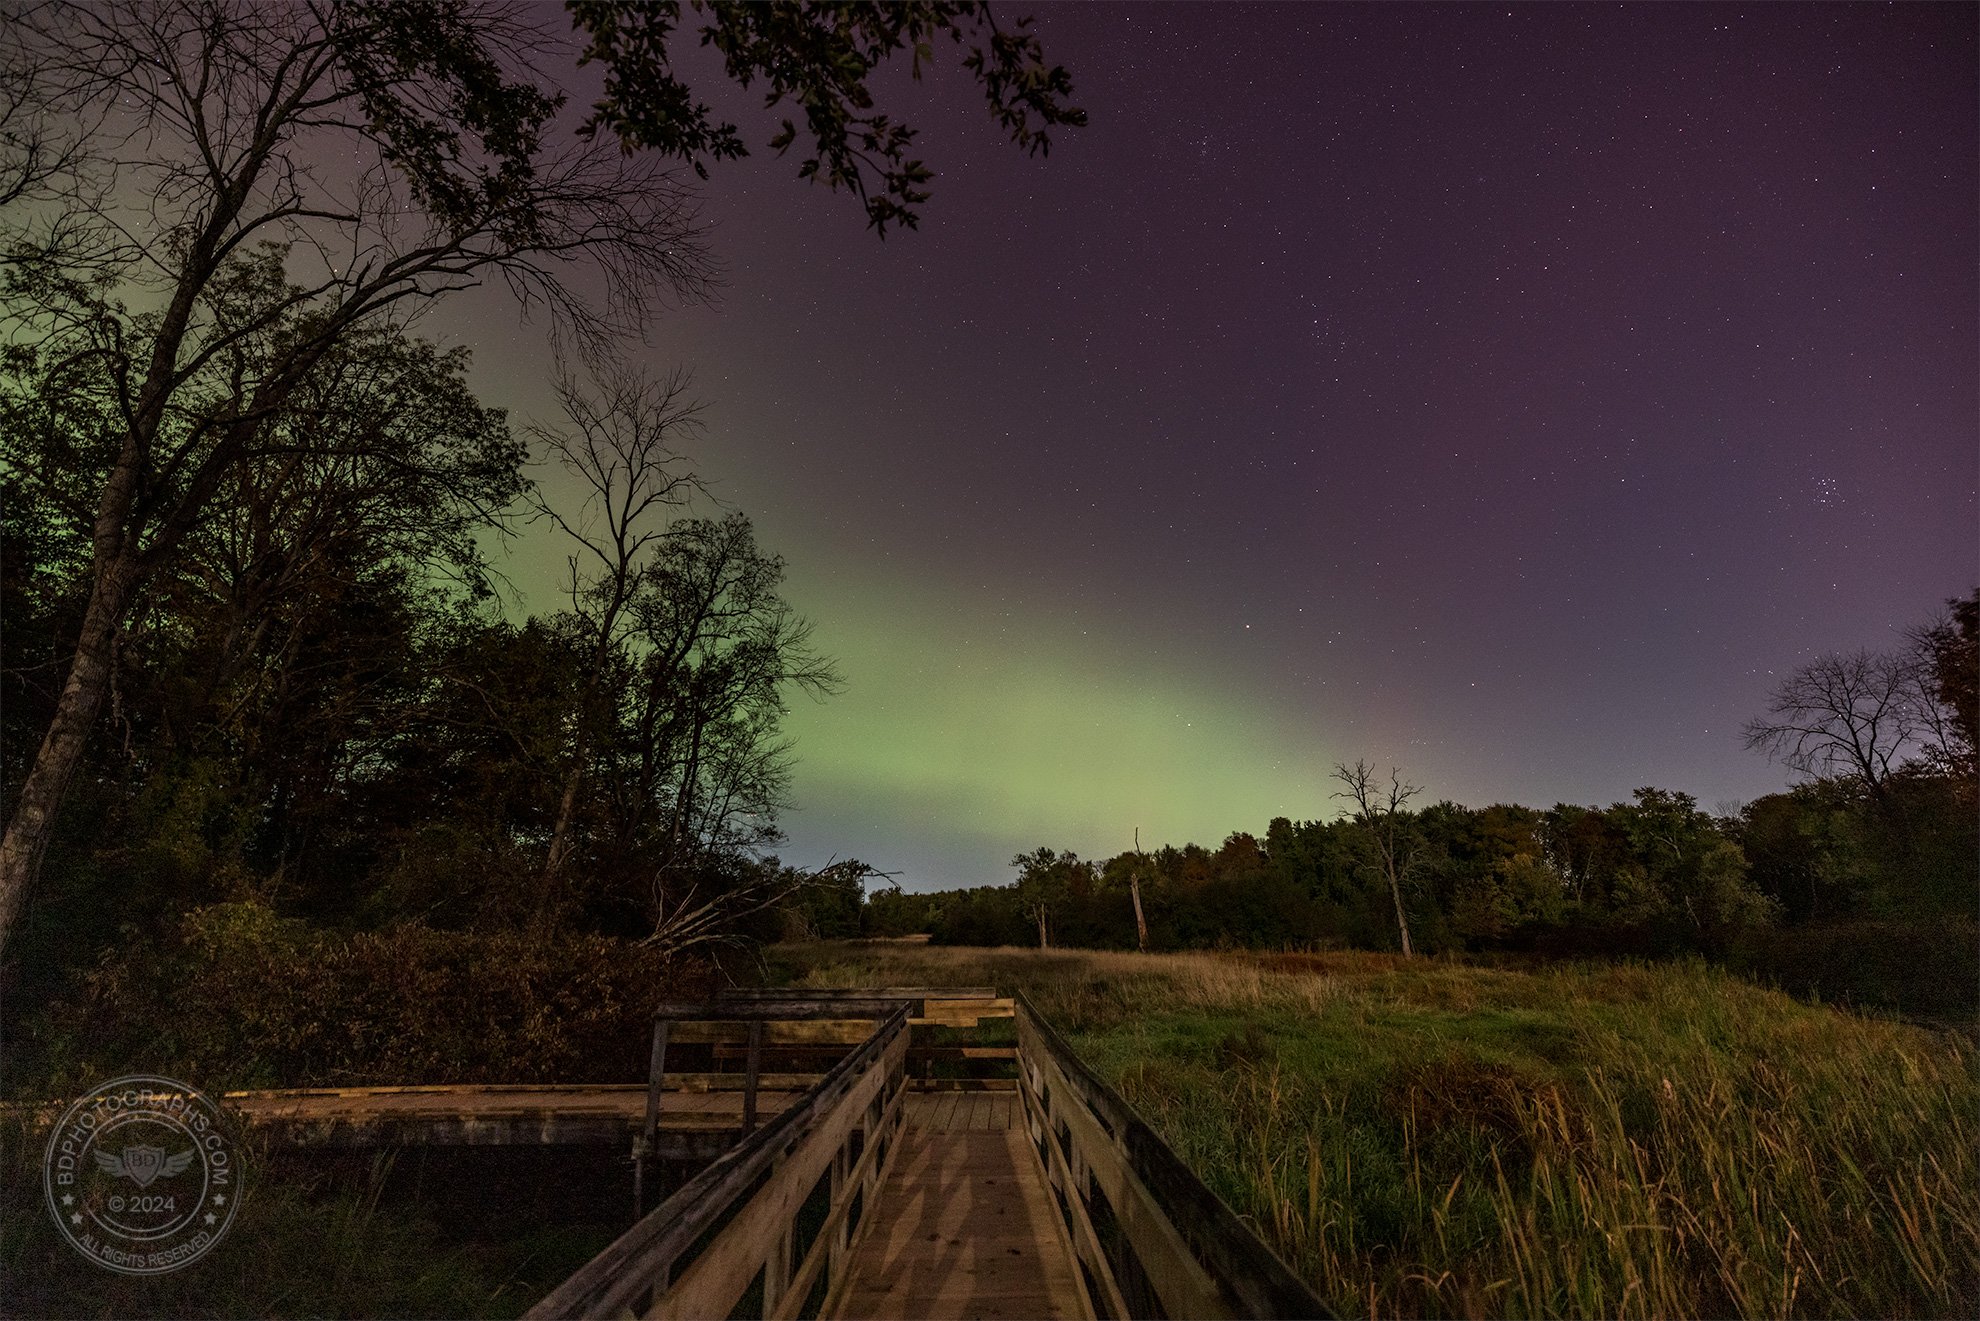
At first just a hint of green to the northwest. Truthfully, I would have been happy with this, but there was more to come…

More color looking northeast

Green and purple later on. The setting quarter moon behind me was so bright it cast shadows across the boardwalk.

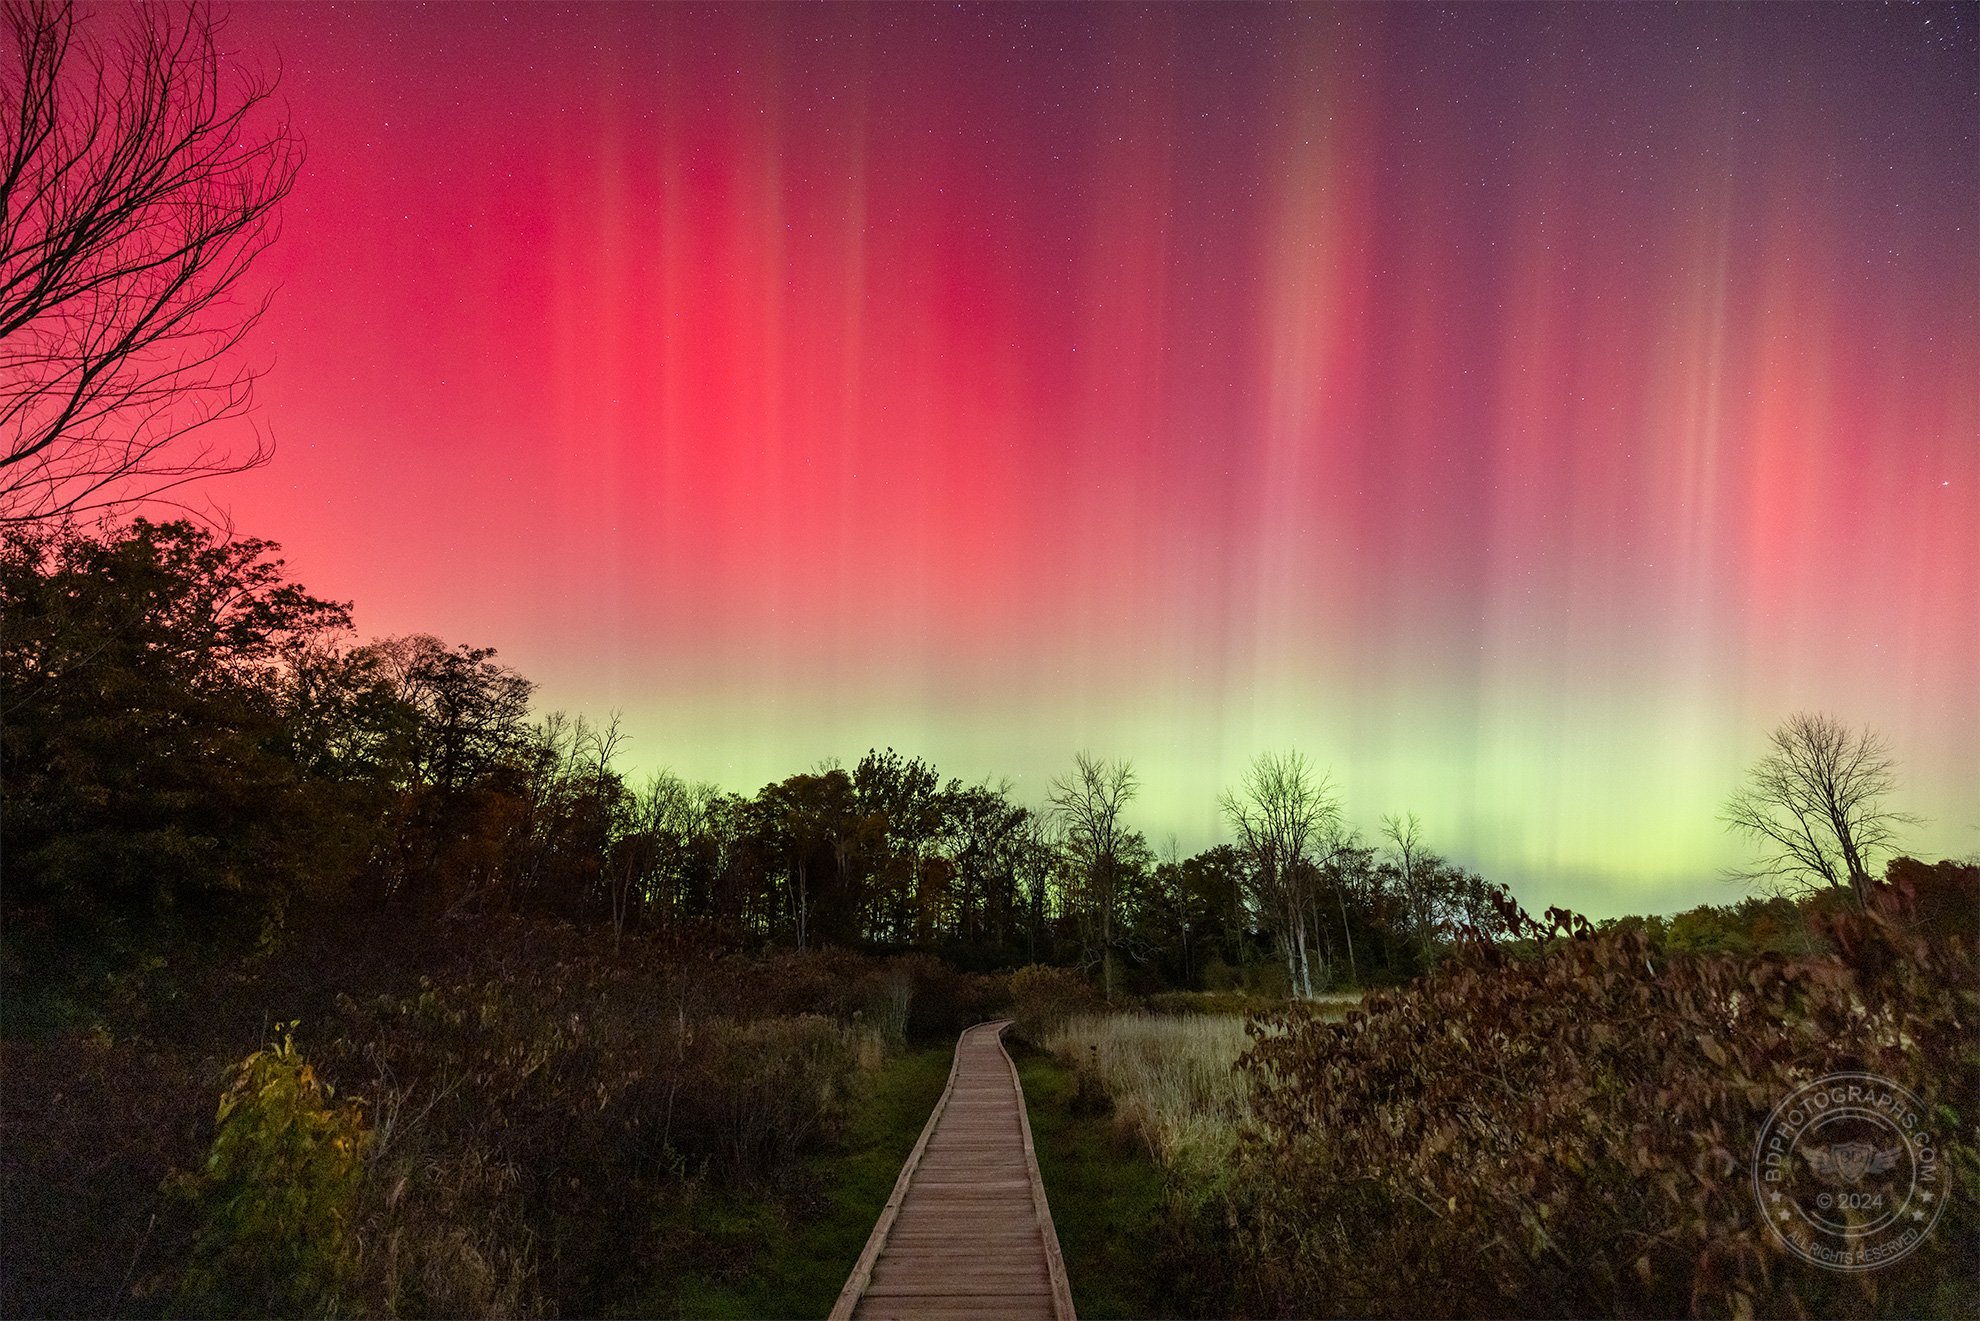
Showtime! A substorm flared up shortly after 10 PM. Moments after I captured this image, I set up for the “astro-selfie” at the beginning of this blog.

Some have asked me what the aurora looks like to the naked eye. Surely it cannot be as brilliant and saturated as these images, right? And the answer is yes, that is true of most celestial bodies and cosmic events, except perhaps for the moon. Nonetheless the aurora is very much visible to the naked eye and the colors and textures readily apparent. There’s no way we can see light the same way as a long camera exposure, but that doesn’t diminish the incredible experience of witnessing the northern lights. 

Approximation of what the human eye sees (left) versus the camera (right)

I shot this event with my Canon EOS R5 camera body stacked with a wide-angle RF 15-35mm F/2.8L lens. For a vast night sky, a wide field of view is the preferred choice, so most images were shot at the widest 15mm. 

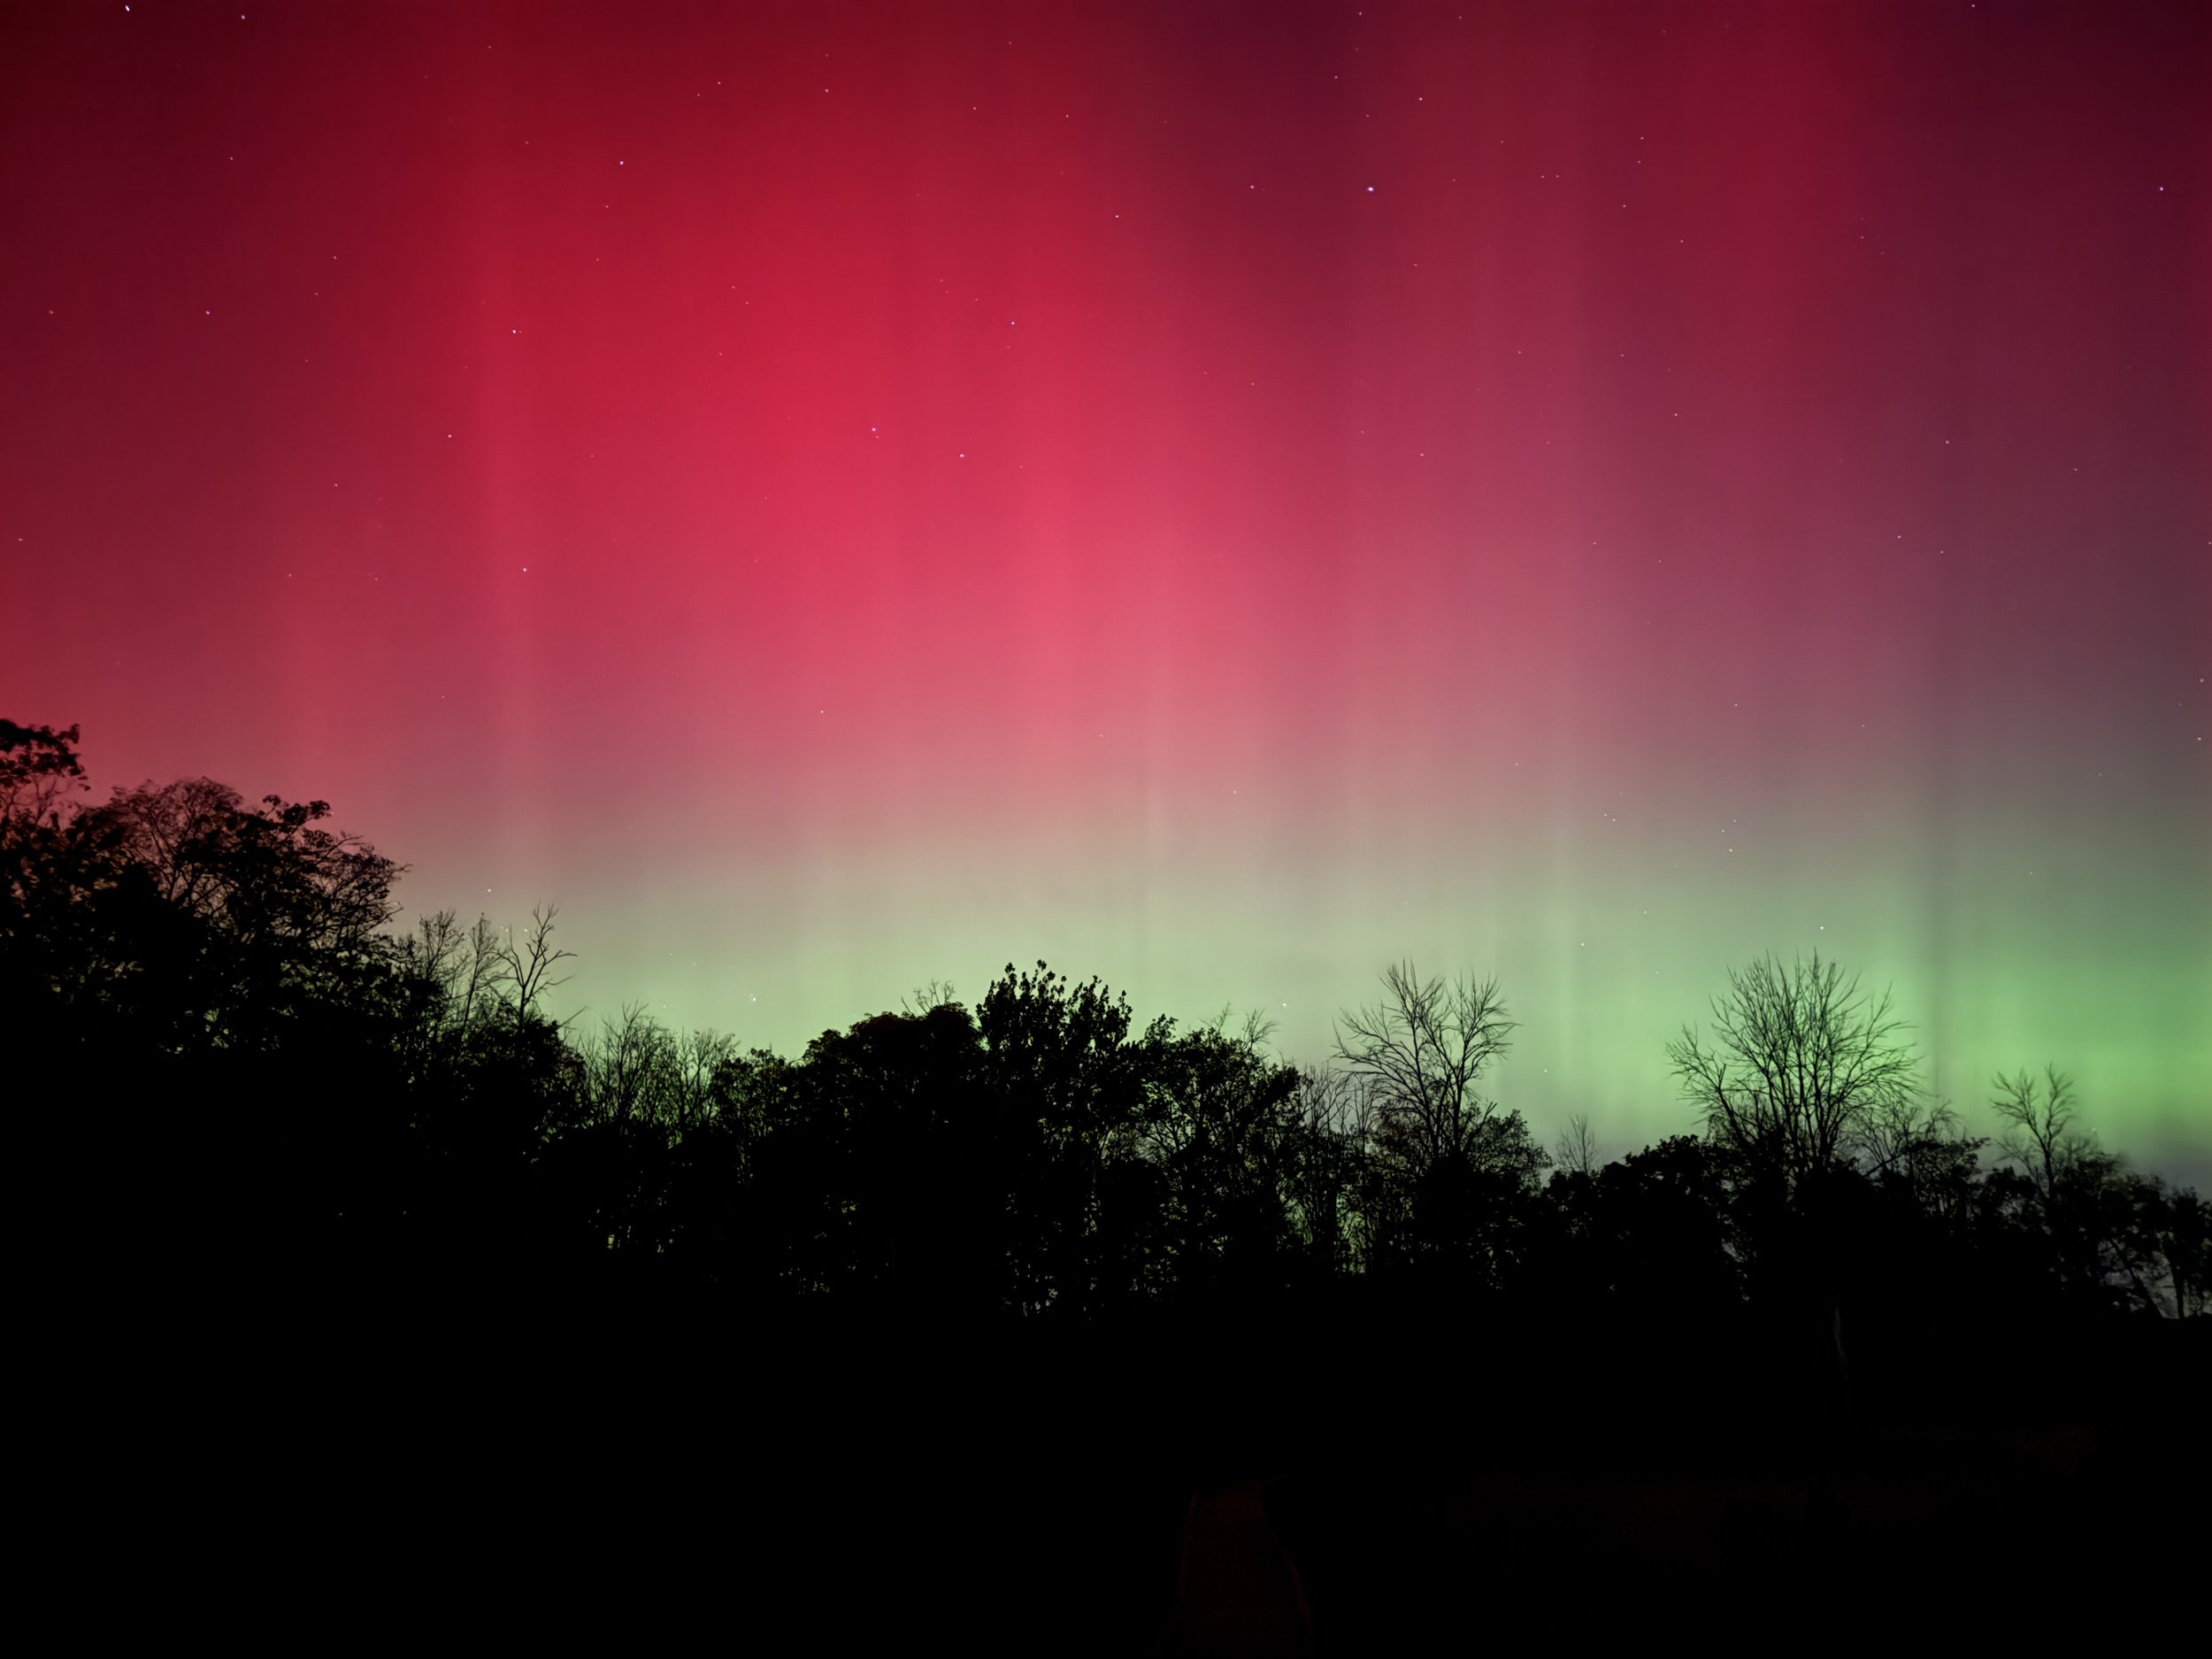
You don’t need an expensive camera to photograph the aurora, however. Many smartphones released in the last few years are packed with impressive optics. This image was photographed with my iPhone 15 Pro. 

iPhone exposure of the aurora in northern New Jersey. I also caught the aurora with my phone in Norway.

Fingers crossed for another aurora event sometime soon. And for clear skies to see it.
Farewell to the SS United States

The SS United States in her glory years. The ship has been out of service since 1969.

I recently visited the SS United States, one of the last remaining ocean liners from the generation that followed Titanic and other famous ships of the 20th century. Numerous celebrities and US Presidents set sail on the United States in its relatively short career, as did the Mona Lisa for special exhibitions in Washington and New York. The ship is 990 feet long (easily surpassing Titanic) and held the record for the fastest crossing of the Atlantic by a passenger vessel. Sadly it has been deteriorating in Philadelphia for decades, and a series of more recent legal setbacks have forced the ship from its berth toward an undetermined fate. The situation continues to develop, but it is quite possible the next time I photograph this ship it will be underwater as an artificial reef… **

** UPDATE: As of October 2024, the SS United States will transfer into custody of Okaloosa County, Florida where it is expected to become the world’s largest artificial reef. 

The SS United States is challenging to photograph in its Philadelphia home. While its gargantuan stature is visible from a distance, the ship is in a restricted area behind a tight chainlink fence with openings too narrow for anything but a cell phone lens. Various utility vehicles and stacked palettes obstruct the view from ground level and overall compositions are few. (A bit later we’ll examine the shot from ground level, through the chainlink fence). Over the years the conservancy managing the ship has provided very limited opportunities to visit the ship, often at prohibitive cost. 

The original drone shot. The cleanest and most effective way to shoot this subject was with a low-flying drone. A common misconception is that drone photos require high aerial viewpoints, but the drone is capable of so much more than this! The scale of the ship is difficult to comprehend. Look at the size of the railing on the main deck and you can imagine the size of a person for scale.

Given these obstacles, I planned a drone shot for sunset (to ensure the west-facing subject would not be backlit), hoping to capture the ship in good light with a dramatic sky. Notably, the airspace surrounding the ship is within what’s known as “Philadelphia Class B”, i.e. controlled airspace in the vicinity of Philadelphia International Airport (PHL). Drones are permitted but only with FAA pre-clearance. I put off this shoot for years — there was always something else to do and I rarely found myself passing through Philadelphia with an opportunity. But with the deadline looming for the ship to be removed from its home, I made the trip on a rainy August afternoon, hoping for a last glimpse this historical wonder. 

A common misconception about drone photography is that it is the same as aerial photography. While it’s true that a drone can achieve many of the same views as a low-flying airplane or helicopter, drones are more versatile and have the ability to capture unique perspectives. In the case of the SS United States, the shot I wanted was not necessarily at great elevation — I simply wanted something unobstructed and higher than ground level. The resulting image showcases the impressive bow and bridge, but the stacks and rear part of the ship appear small and distant. This is one of the downsides to shooting a relatively wide angle (the drone shoots at 24mm): objects close to the camera appear exaggerated and larger, dwarfing more distant elements. This is why you should avoid taking close portraits with a wide angle lens to avoid the unflattering rendering of facial features. 

This is a telephoto drone shot, using the DJI Mavic 3 7x telephoto lens, equivalent to 162mm. High compression gives the ship a stout appearance.  

After the primary shot, for an alternate perspective I flew higher and farther away to capture additional images. The DJI Mavic 3 actually has two cameras: a primary Hasselblad camera at 24mm, and a second telephoto camera that shoots roughly 162mm, or 7x magnification. Shooting far away at the higher focal length gives the ship a compressed, stocky appearance. Both focal lengths available on the drone present the ship in different ways. The sweet spot, in my opinion, is somewhere between the wide and the telephoto lenses. 

The ship photographed through the chainlink fence. Using multiple exposures and post-processing techniques, most of the fence is neutralized in this image, but some artifacts are still evident (notice some dark blotches in the foreground). Compare the before and after images.

For a final shot, I visited on foot and used my primary camera. The challenge here is that obstructing chainlink fence that I mentioned earlier. But all is not lost if your only option is to shoot through a fence. There are some mitigating techniques you can employ to reduce the impact of the fence on your final image: 

  • Telephoto is your friend. A higher focal length is less impacted by distractions close to the lens, in this case, the chainlink fence. The image above was shot at 70mm, at the upper end of my Canon RF 24-70mm F/2.8L lens. I would have preferred an even higher focal length, but I did not have my 70-200mm lens with me at the time. 

  • Take multiple exposures of each shot, especially if shooting hand-held. This means for each shot, take 3-4 images rapidly and try to move as little as possible between shots. Later on, in Photoshop, you can use a feature to filter out some of the fence while retaining the subject. The image above was created by feeding four images into the Statistics engine of Photoshop. (Statistics looks at what is constant within a set of images versus what is different. In this example, the ship is constant, but the fence is slightly different in each exposure due to tiny hand-held movements. Photoshop averages out the differences which reduces (but does not completely eliminate) the appearance of the fence.) 

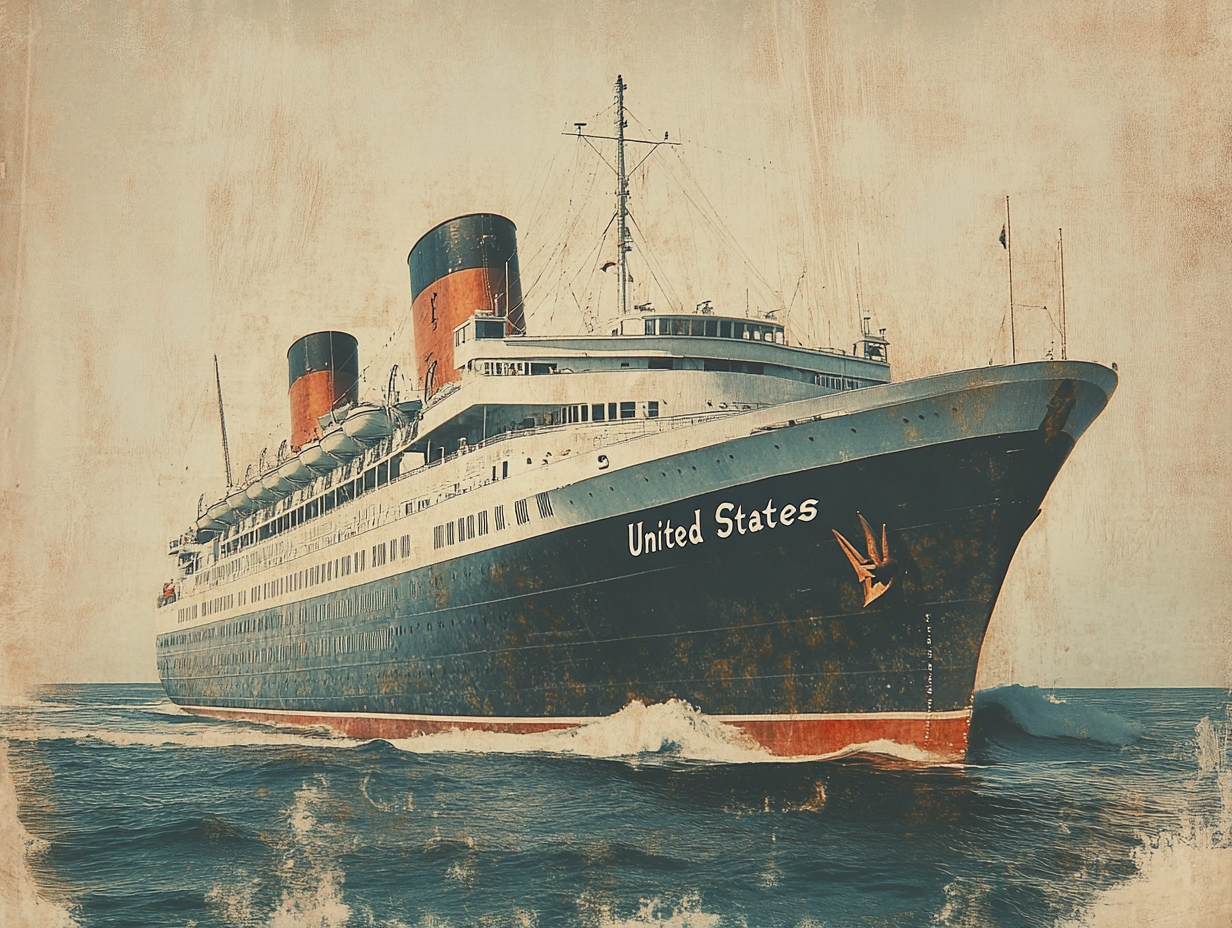
Just for fun, I asked AI to render a vintage postcard of the SS United States. Not bad at all! 

10 Tips to Photograph in Harsh Light

We know the most fundamental principle of photography is the quality of light. Outdoor photographers learn quickly to shoot in the periods near sunrise and sunset for soft, directional, and colorful light. The quality of light is the magic: a fairly mundane subject bathed in golden light can look brilliant, while a spectacular icon in poor light can be profoundly uninspiring. Consider these two images — which photo is more pleasing?

Blog_KL.jpg
Blog_Colosseum.jpg

In the first example (L), a slab of limestone glows during the golden hour in the Florida Keys. In the second photo (R), the iconic Colosseum stands surrounded by tourists at lunchtime.

Even the most committed Europhile can see that the sunset image is the winner, and that the contest is decided entirely by the superior quality of light. But high quality light is fleeting and elusive, and most of the time light is either harsh (in sunny weather) or diffuse (when it’s cloudy). Overall the opportunity to photograph in high quality light is approximately one hour in the morning and another in the evening — if the weather cooperates. 

So what are we to do with the many hours of daylight where the quality ranges from mediocre to terrible? (Top answers from photographers: “edit photos”; “travel to the next spot”; “get some sleep.”)* Although harsh light creates a jarring contrast of unpleasantly bright highlights and dark shadows, not all harsh light is untenable. In some instances it even provides superior opportunities to shoot. Let’s look at how we can make the best of these daylight hours.

*Not an official poll

1. CROP OUT THE SUN. To begin, we should qualify that harsh light is not a singular condition — it varies by time of day, time of year, weather, and location. In general daytime shooting is better in the winter when the sun is relatively low throughout. In this wintry scene, the sun provides bright but directional light onto our subject, while the snow acts as a natural reflector and brightens the darkest areas.

Winter is arguably the best season for daytime photography because the sun is always relatively low, especially at the more temperate latitudes.

Winter is arguably the best season for daytime photography because the sun is always relatively low, especially at the more temperate latitudes.

2. SHOOT DIRECTLY IN TO THE SUN. I know, it sounds crazy, but when the sun is not directly overhead, we have an opportunity to include it in our shot. Think about a child’s drawing that includes the sun in the corner, beaming down onto the scene. In this example the morning sun (approximately 9:45 a.m. in autumn) radiates across a blanket of clouds below Mt. Washington, New Hampshire. I used a tight aperture (f/22) to achieve the sun-star effect. For a cleaner image, make sure to remove any filters from the front element of your lens before shooting directly into the sun. 

In this example the subject makes the shot. The harsh light is forgiven because we are looking down a road above the clouds.

In this example the subject makes the shot. The harsh light is forgiven because we are looking down a road above the clouds.

The next several examples are related in concept: each involves using a natural filter to control or block out the overhead light. 

3. SHOOT UNDERWATER. Underwater photography is one of the few instances in which bright overhead light can be beneficial. A signifiant amount of ambient light is absorbed by water, especially at depth where most shipwrecks lie. In this case the ship (L) is in water approximately 65’ deep so bright filtered sunlight is a welcome addition to our scene. We don’t need to dive down into the depths to appreciate the overhead sun, however. A southern stingray (R) swims in waist-deep water as the morning sun creates a web of texture across the sandy bottom. 

In deep water we need all the light we can get so midday sun is welcome.

In deep water we need all the light we can get so midday sun is welcome.

Not a diver? No problem. This was shot in water three feet deep.

Not a diver? No problem. This was shot in water three feet deep.


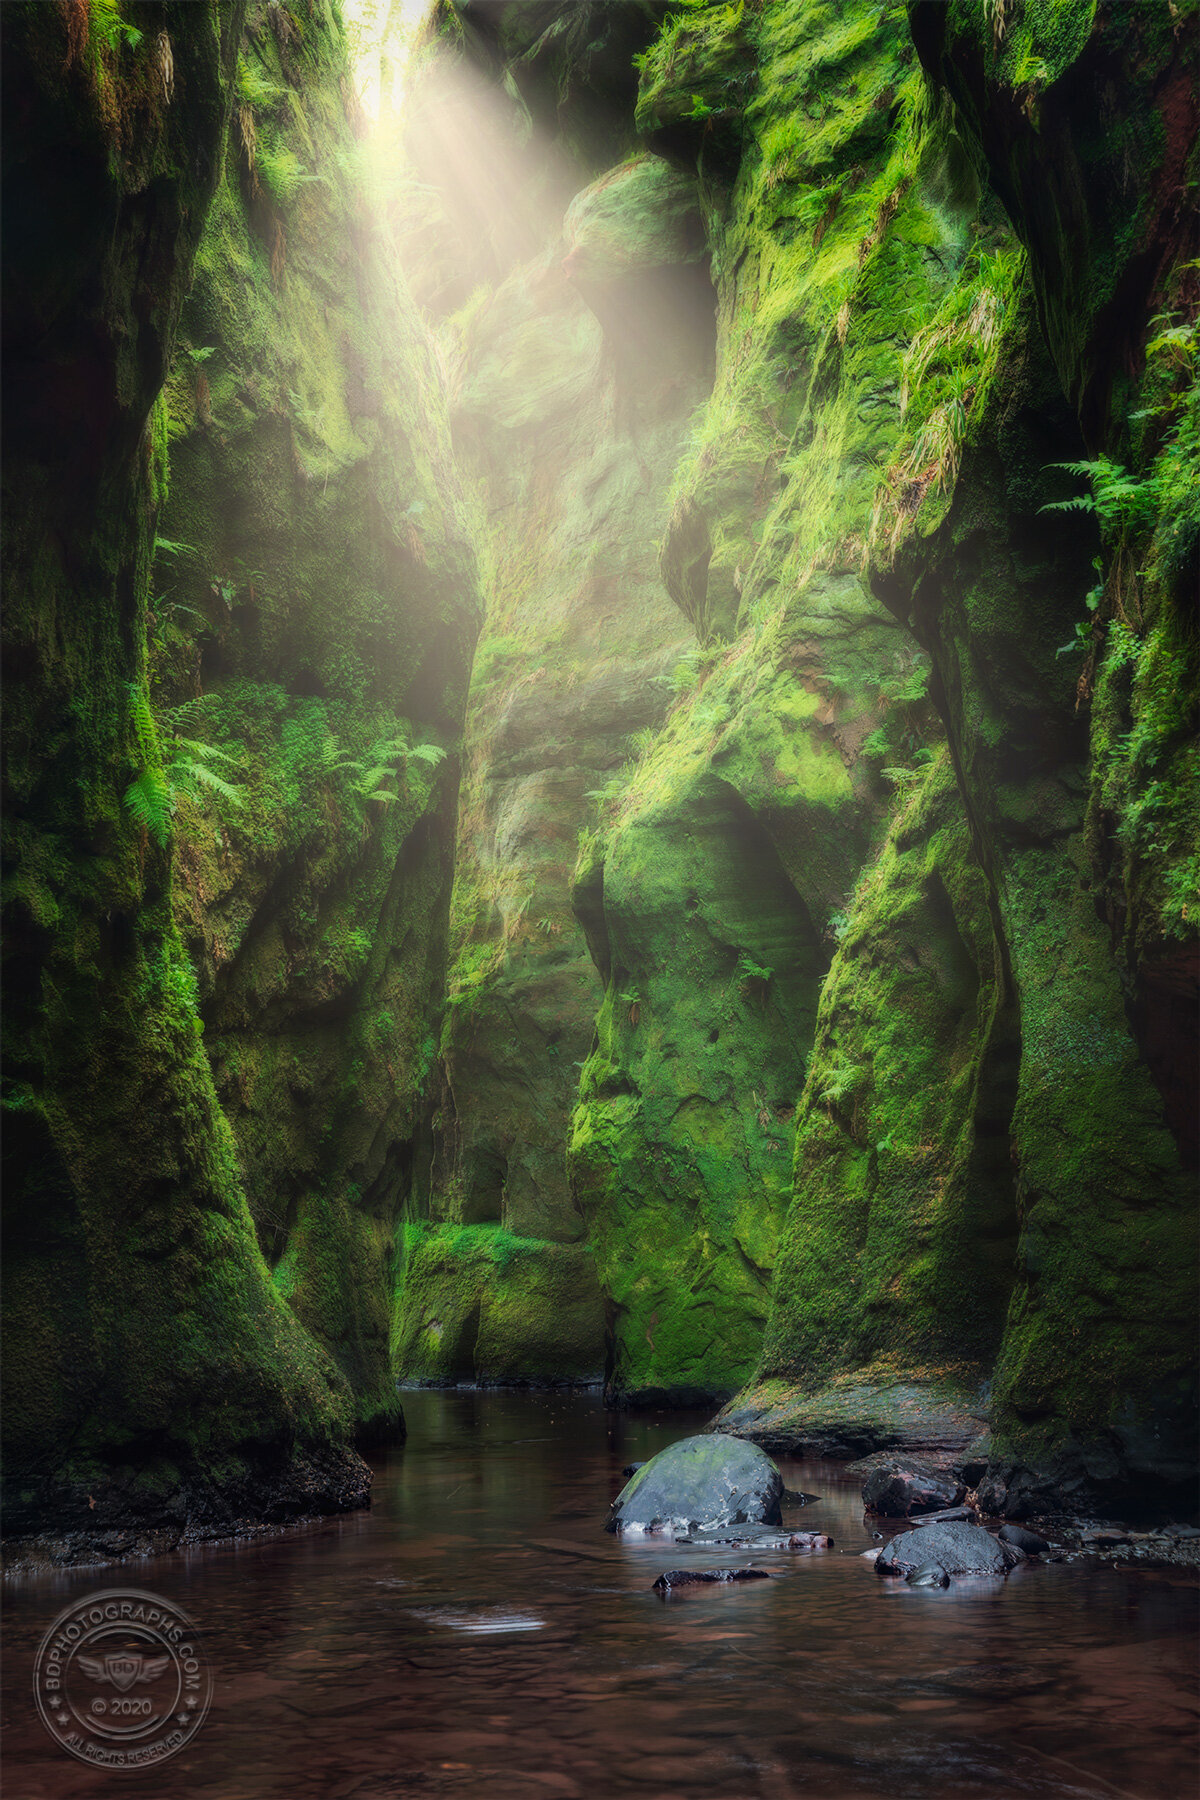
4. USE THE FOREST CANOPY. Trees act like a giant colander that can create dappled light, and — in humid conditions — sun rays. Each day is different and the light changes constantly throughout the day. Below: Midday sun streams through the forest canopy onto the ravine below, lighting up this magical gorge. 

Blog_Gorge.jpg

5. NARROW YOUR SCENE. Look for locations protected from the harsh daylight such as narrow streets and natural canyons. Near the Arizona-Utah border, direct light hits narrow slot canyons only for a short period of the day, and only in summer months. 

Blog_Antelope.jpg

6. SHOOT IN THE SHADOWS. Focus in on smaller scenes and details in the even light of the shadows. Maybe you’ve found an interesting sculpture, a beautiful doorway, or an unusual plant. The key here is that your complete scene should be in shadow and protected from the blinding sunlight. I took this portrait of two Bedouin friends in a tent at about 2PM while the sun was blazing over Wadi Rum, Jordan. 

Blog_Bedouins.jpg

7. EMBRACE THE WASHED OUT LOOK. You can use the harsh daylight to your advantage if you want to incorporate silhouettes and more muted color in your scene. In this image, shooting toward the sun creates a washed out look. Silhouetted palm trees contrast with a bright sky and the whole scene takes on the look of a vintage postcard. I applied additional edits in Photoshop to accentuate the effect.  

Harsh light can give a diffuse washed-out look a scene. Moody shots like this work best when clouds filter a portion of the sunlight.

Harsh light can give a diffuse washed-out look a scene. Moody shots like this work best when clouds filter a portion of the sunlight.

8. SHOOT EDITORIAL / DOCUMENTARY. When the daylight offers prosaic scenes, record some of the details of time and place. There is value to capturing images “behind the scenes” even if those photos will never become portfolio pieces or social media shares. Below: after a morning of photographing Atlantic Puffins from a blind on Machias Seal Island, I photographed the blind and the remote island itself to include in an article about the experience. 

This image won’t win any awards, but it is not meant to… it tells a story in a larger collection of photos.

This image won’t win any awards, but it is not meant to… it tells a story in a larger collection of photos.

9. SEND UP THE DRONE. Shooting directly down in midday sun creates an even, brightly lit scene — similar to  shooting under an overcast sky, just brighter and warmer. Look for interesting patterns and textures. Remember that you can easily over-expose bright colors in this light, so if you want to retain detail in the highlights, you may need to underexpose by one or two stops. This beach image was inspired by Neopolitan ice cream, and captured under the blistering Maldivian sun. 

In between dives in the Maldives I sent up my drone to record some b-roll footage for a video about underwater photography. The sun was scorching and there were no obvious photo opportunities so I took a few top-down shots and packed it up. Later wh…

In between dives in the Maldives I sent up my drone to record some b-roll footage for a video about underwater photography. The sun was scorching and there were no obvious photo opportunities so I took a few top-down shots and packed it up. Later while reviewing the photos I cropped this beautiful beach scene from what looked like a throwaway shot. It has since become one of my more popular images.

10. SHOOT INDOORS. This might seem like a cop-out but if your goal is to make great images and the light outside is just not happening, why not take the shooting inside? Consider this an opportunity to experiment with different locations and compositions. Shooting indoors is also good practice to work with low light conditions and push the capabilities of the camera. My favorite place to shoot in New York City is actually indoors in the period rooms at the Metropolitan Museum of Art. 

The period rooms at the Metropolitan Museum of Art always deliver a stunning visual experience.

The period rooms at the Metropolitan Museum of Art always deliver a stunning visual experience.

Of course, we’d prefer to shoot scenes in the morning golden hour or at sunset, but if that sweet light lasted all day the resulting images wouldn’t be nearly as special. Next time you find yourself in harsh light conditions, consider all the opportunities you still have to create great images.